Ready to translate your digital design into a print-ready file but not sure how to handle the foil stamping elements? In this post, we've got your back. We explain in detailed but easy-to-understand steps everything you need to know.
Foil stamping is a striking finishing technique that adds a touch of luxury and sophistication to a broad selection of print products from book covers—think of the gold author name on a high-concept romantic thriller, for example, which will often also be embossed—to trading game cards, board game components, high-class packaging and top-level business publications. By using a heated “die” (a kind of three-dimensional metal mold) to apply metallic or pigmented foil to a surface, foil stamping creates eye-catching designs that can really work to enhance the look and feel of book covers, board game components, trading cards, and packaging. But this process isn't just about adding aesthetic value; it also enhances the perceived quality and sales value of the product while incurring minimal extra investment. At QinPrinting, we can say without blushing that we are the world experts in this process, so if you need to learn how to prepare a print-ready PDF file for foil stamping, you've come to the right people! In this post, we'll guide you through the steps needed to get everything perfect, so you can achieve professional results.
Creating a print-ready PDF for foil stamping means taking as simple series of logical steps to prepare your design file. These steps are necessary to make sure that your digital design translates perfectly into the printed product. So, the process begins with selecting the right design software and ends with exporting your file for printing. By following our guidelines, you can create a flawless design file ready for the foil stamping process. We strongly recommend that you watch the instructional video above first as it will help you understand the rest of what follows.

Step 1: Open your design file in suitable software
To begin, open your design file in a vector-based design software such as Adobe Illustrator or InDesign. These programs are ideal for creating and manipulating vector graphics, which are going to need for foil stamping. Once you've opened your file, make a note of the elements of your design that you want to enhance with foil stamping, such as lines, images, borders, or logos.
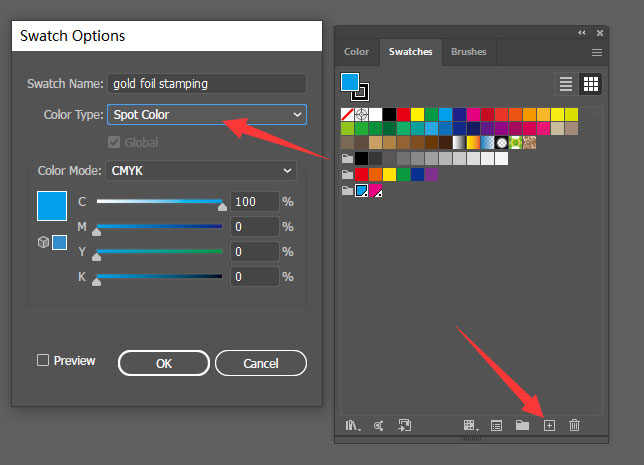
Step 2: Create a new spot color
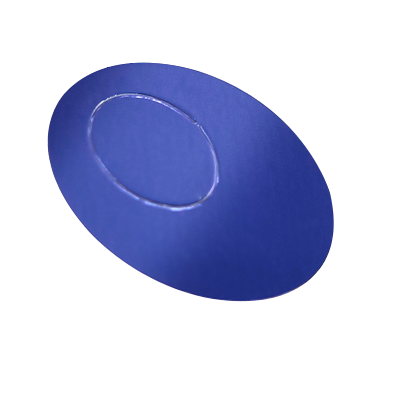
Next, open the swatches panel and create a new color swatch. Name this swatch for something logical and clear, such as “Gold Foil” or “Silver Foil.” Set the color type to “Spot Color” and adjust the color values to your preference. Avoid using white. This spot color will act as a placeholder for the foil in your design. There's no need to create a “metallic” effect in your design; just add your chosen spot color. Plain old blue is a common choice and works as well as anything else!
Step 3: Apply the spot color to your design elements
Select the parts of your design that you want to foil stamp and fill them with the newly created spot color. Make sure that these elements are vector-based. If your design includes raster images, you will need to outline each element using the pen tool and fill them with the spot color. This step can be time-consuming, so it's best to start with vector elements whenever possible.
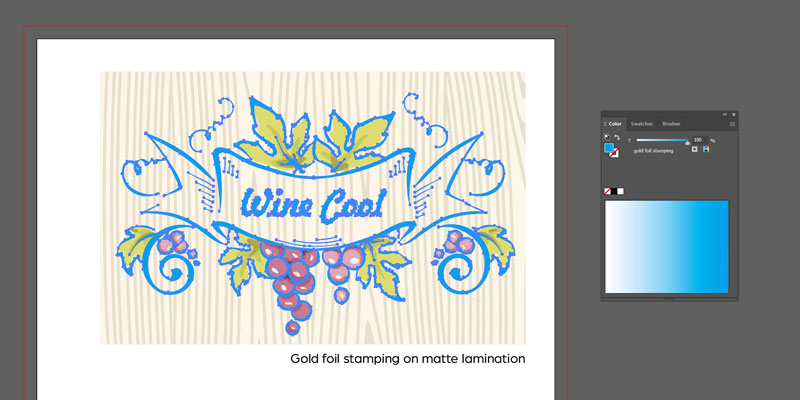
Step 4: Prepare for multiple finishing techniques
If you plan to combine foil stamping with other techniques, such as embossing, create additional spot colors for each technique. For example, if you want to foil stamp and emboss the author's name on a book cover, create a spot color named “Gold Foil + Emboss” and fill the text with this color. This will help differentiate the areas that require multiple finishes.
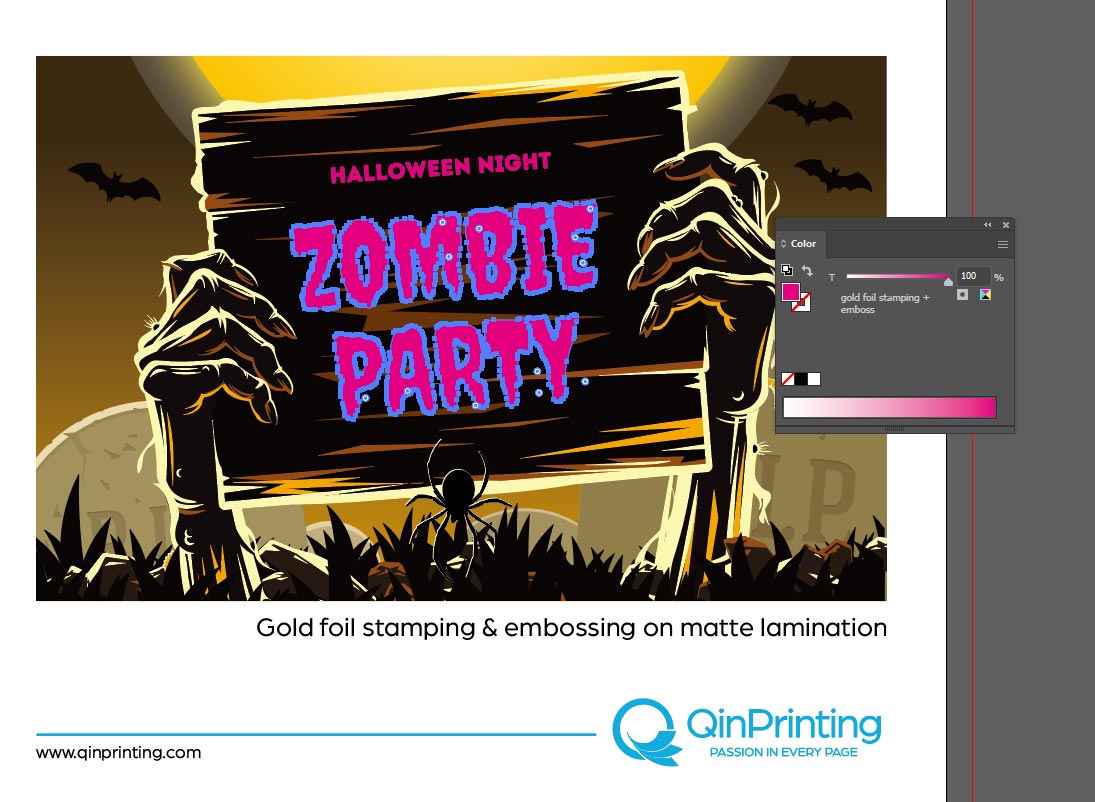
Step 5: Applying multiple foil colors
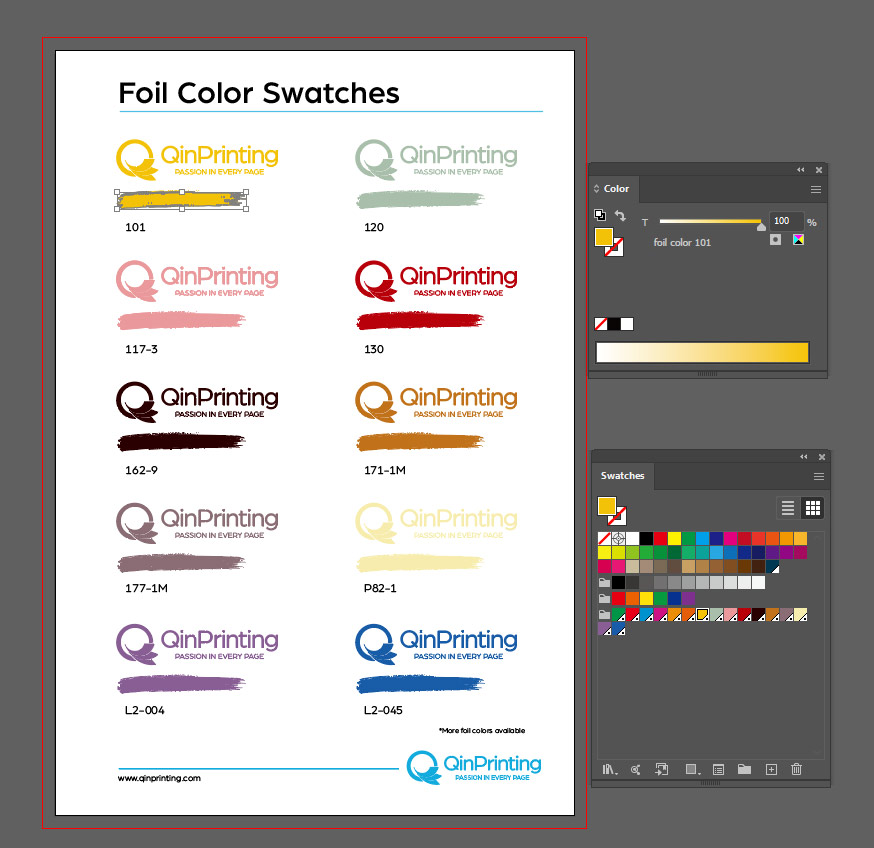
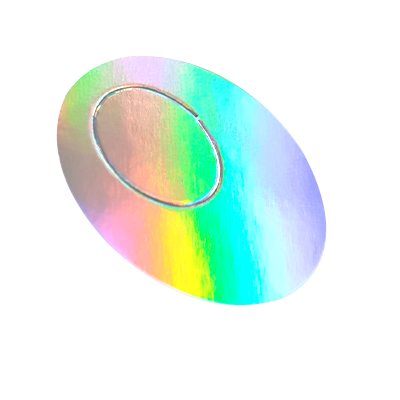
If your design requires multiple foil stamping colors, create a separate spot color for each one. Name each spot color appropriately, corresponding to the foil color you plan to use, even if the actual color displayed on your screen is not exact. This helps to avoid any confusion during the printing process.

Step 6: Check and adjust your design
Before exporting your file, review your design to be certain that all elements requiring foil stamping are filled with the correct spot colors. This is also a good time to check for any potential issues, such as overlapping figures or misaligned text.
Step 7: Export your file as a PDF
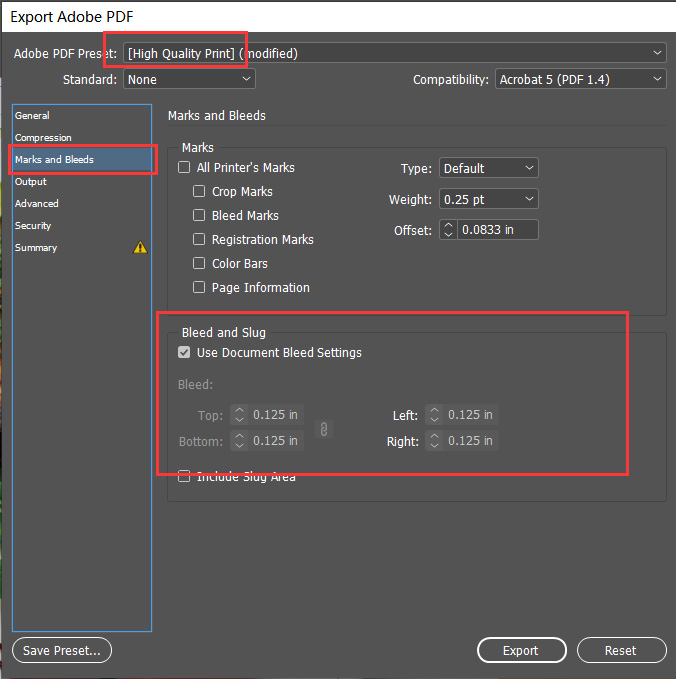
Once your design is complete and you've checked it thoroughly, you should be ready to export the file. Select “File” from the menu, then click “Save As” and choose “PDF.” Make sure to include bleed zones to prevent unwanted white borders and to account for any trimming that will occur during the post-printing production process.
Step 8: Use Adobe acrobat to verify your PDF
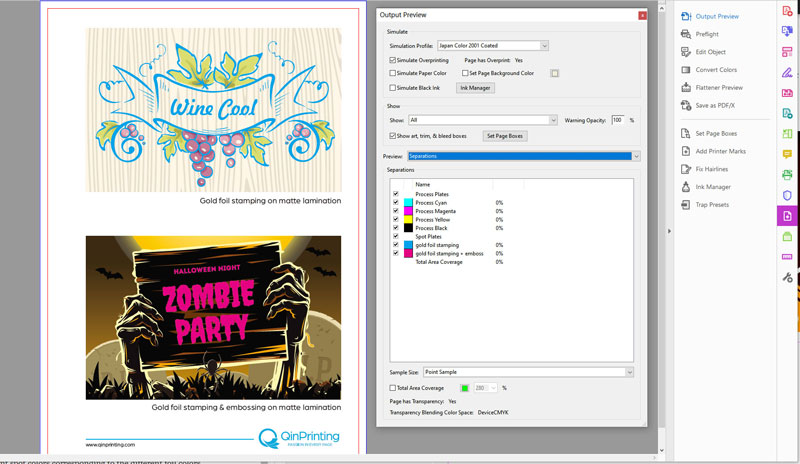
Open the exported PDF file in Adobe Acrobat and use the “Output Preview” feature under “Print Production” to visualize your design. This tool allows you to check that the spot colors are correctly applied and that your design is ready for foil stamping.
Advantages and uses of foil stamping
Foil stamping offers several advantages, making it a popular choice for a variety of print products. Here are some key benefits and common uses you might wish to consider:
- High-quality look: Foil stamping adds a touch of elegance and sophistication to any print product, making it stand out and grab the attention of a potential buyer.
- Increased perceived value: Even though the process adds little to your initial costs of production, products with foil stamping are often viewed as “premium” and luxurious, which can justify a higher price point and boost your profits.
- Versatility: Foil stamping can be applied to a wide range of products, from book covers and packaging to business cards and invitations and you can combine it with other finishes such as embossing and debossing or UV spot coating, for example.
- Durability: Foil stamping is resistant to wear and tear, so you can be confident that your design will still look great months and years down the line.
- Customization: With a variety of foil colors and finishes available, foil stamping allows for endless customization options to match any brand or design aesthetic according to your needs.

Common uses of foil stamping in print products
- Book covers: Foil stamping on book covers can highlight titles and author names, giving the book an authoritative and prestigious look.
- Board game components: Foil stamping can be used on game boxes, boards, and cards to add a unique and attractive style to the game.
- Trading cards: Collectible trading cards often use foil stamping to highlight rare or special edition cards.
- Packaging: High-end product packaging frequently incorporates foil stamping to create a luxurious and classy appeal.
- Business cards: Adding foil stamping to business cards can make them more memorable and impactful.
So, there you have it! Preparing a print-ready PDF file for foil stamping requires careful attention to detail and a solid understanding of the process. But by following the steps we've given you in this guide, you can create a flawless design that translates perfectly onto your final printed product with no great difficulty. Whether you're working on book covers, board games, trading cards, or packaging, foil stamping can significantly enhance the visual appeal and perceived value of your project. So, take your time, use the right tools, and you'll be well on your way to creating stunning foil-stamped designs.
Talk to us! We're here to help.
At QinPrinting, as a global leader in the international offset printing industry, we work daily with both corporate and private clients to create exquisite foil stamped printed products of all descriptions and levels of complexity. Our worldwide stems from our detailed knowledge and decades of experience combined with state-of-the-art printing technology at our facilities in the beautiful city of Shanghai, unmatched low prices, strenuous quality controls, and an old-fashioned dedication to personalized customer care. We created this guide—with video, text, and screenshots—to make your life as easy as possible when it comes to creating your print-ready foil stamping files. But if you still have questions, please get in touch. We're here to help! Shoot us an email to [email protected] or call us on +1 951 866 3971 (remembering potential time differences!) and we'll be delighted to discuss your needs, answer your questions, and help in any other way we can.
Shoot us an email to [email protected] or call us at +1 951 866 3971 and we'll be delighted to discuss your needs.

