We show you exactly how to make a pro book cover step-by-step with text, screenshots, and video instructions
In the contemporary world of publishing, independent authors have all the tools to produce high-quality books that rival those from traditional publishers right at their fingertips. As every self-published author or book marketing professional knows, one of the most important elements of a book's success is its cover. A striking, well-designed cover attracts readers and conveys professionalism. Fortunately, with Adobe InDesign and QinPrinting's premade customized book cover templates, you can create a stunning cover with ease, whether you're working on a paperback or hardcover edition.
Step-by-step guide to using QinPrinting templates in Adobe InDesign
1. Download the template
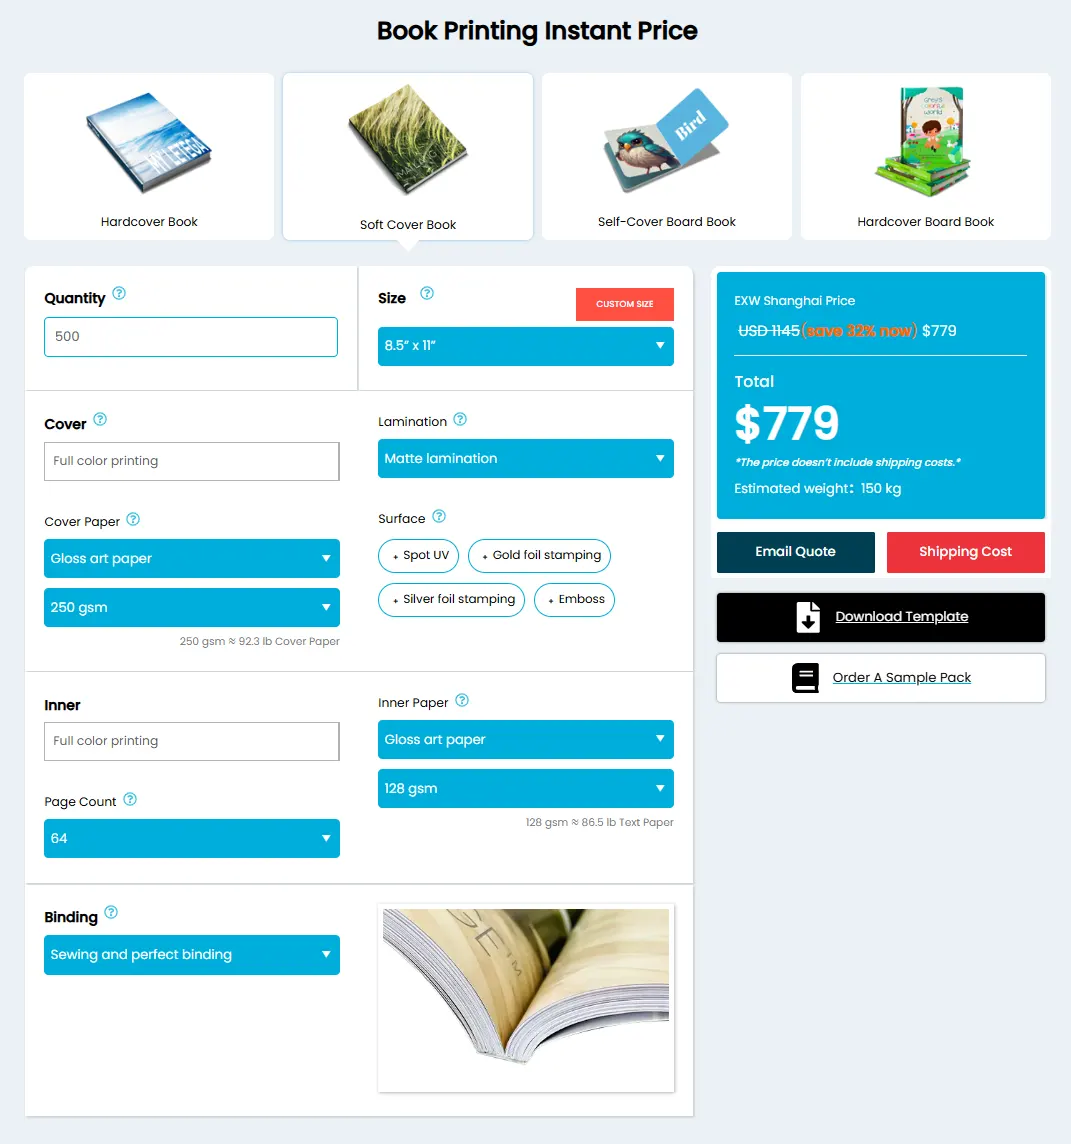
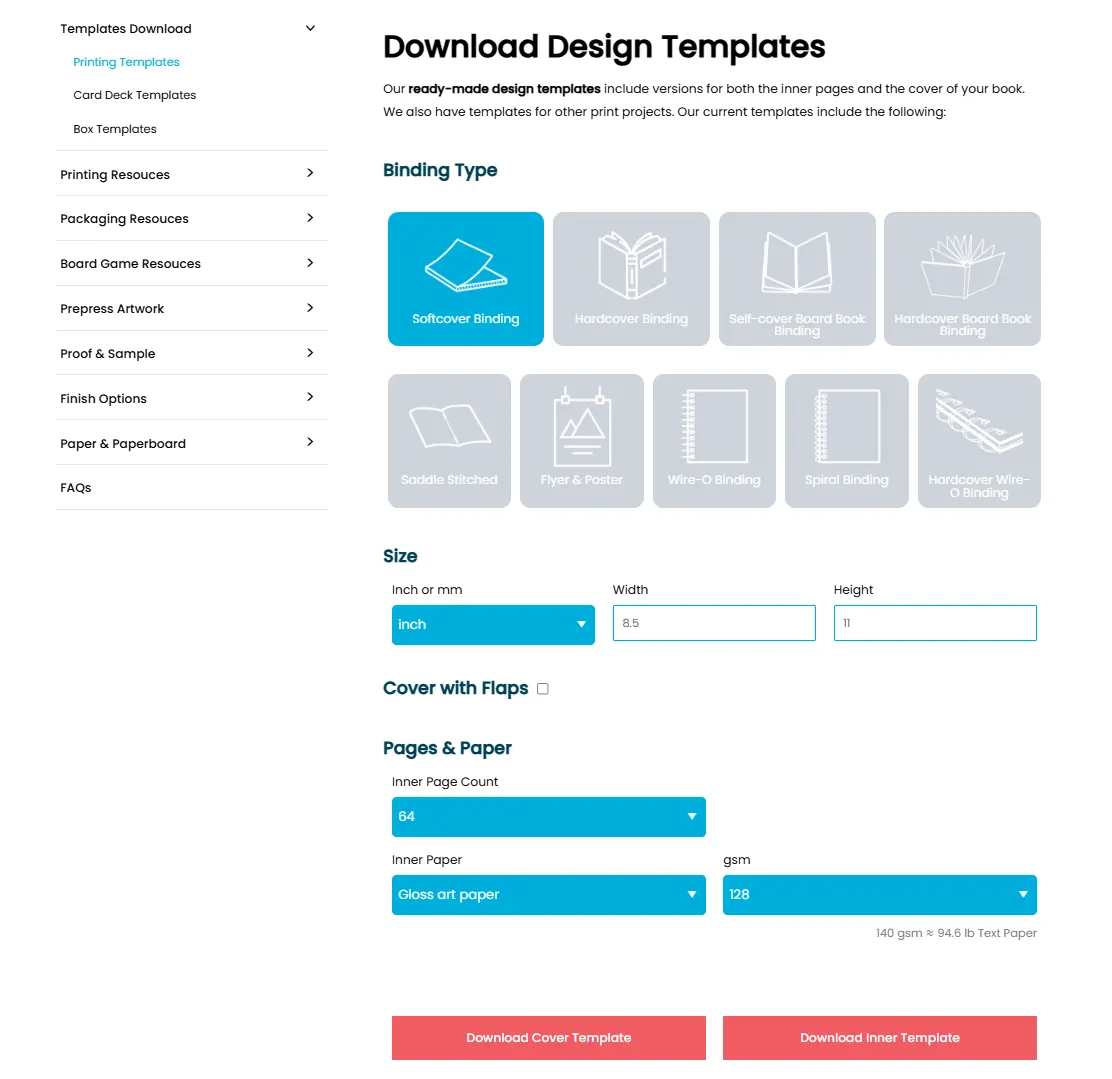
To start, head over to the QinPrinting website and download the template that matches your book's specifications, whether it's a paperback, hardcover, or other format. The website provides options to customize the template based on your book's dimensions, binding style, and paper choices.
2. Set up your project
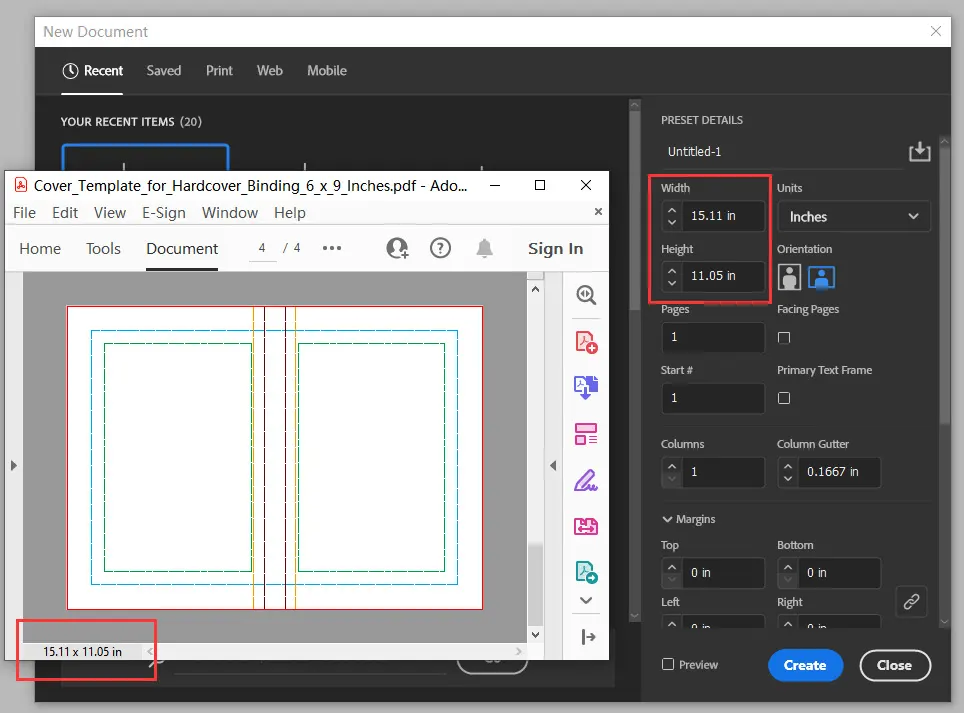
Once downloaded, you'll typically use the last blank page of the template, which includes important bleed lines, trim lines, and safety guidelines. Take note of the dimensions listed in the template—these are the measurements you'll input into InDesign for your new project.
In InDesign, create a new project by selecting “Create New” and inputting the exact dimensions from the PDF template. This step guarantees that your cover layout matches the book's size requirements.
3. Place the template
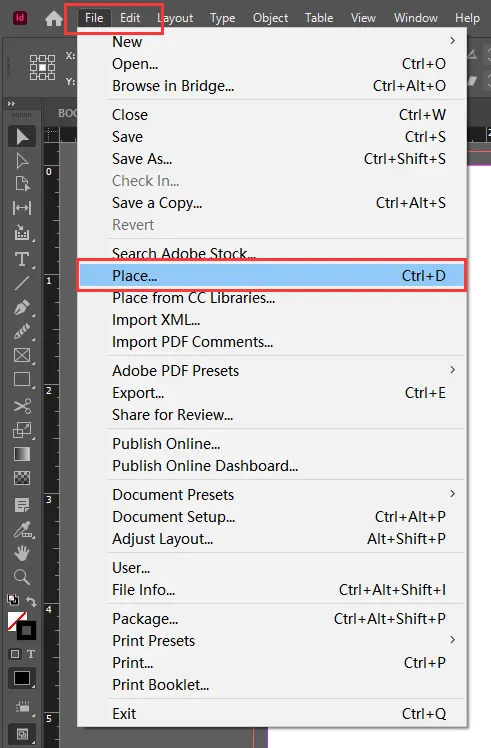
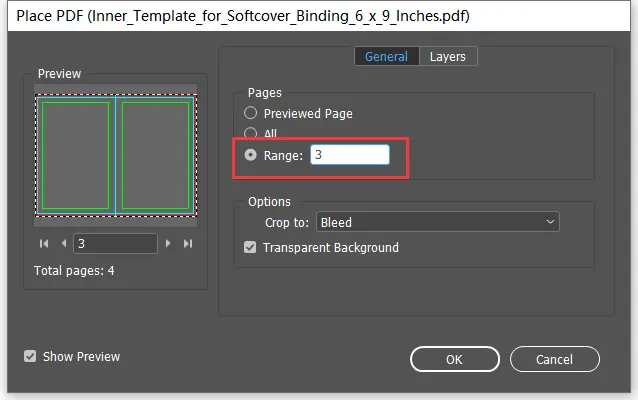
Once your project is set up, go to “File” and select “Place”. Check the “Show Import Options” box to make sure you have control over the imported content. In the “Place PDF” panel, select the appropriate page from the PDF—usually page 4, which contains the cover layout. After placing the template into the file, align it to the center of your project.
4. Lock the template layer
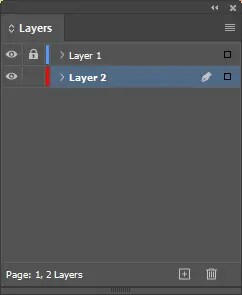
Locking the layer where your template resides helps make certain you don't accidentally move it while designing. In InDesign, you can easily lock the layer, allowing you to create new layers beneath it for your artwork and text.
5. Start designing
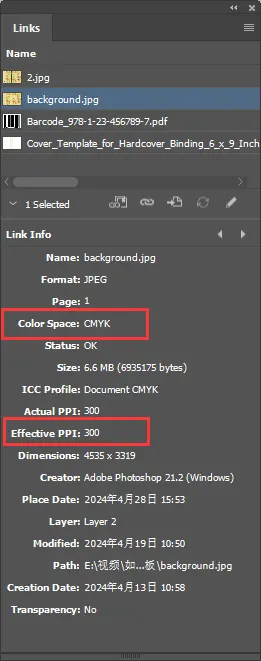
Now, you're ready to begin designing. Place high-resolution (300 DPI) CMYK images on the cover, making sure that any background images extend fully to the red bleed lines. You can use the “Links” panel in InDesign to check the resolution of your images and confirm that they meet the required 300 DPI for print quality.
6. Pay attention to text placement
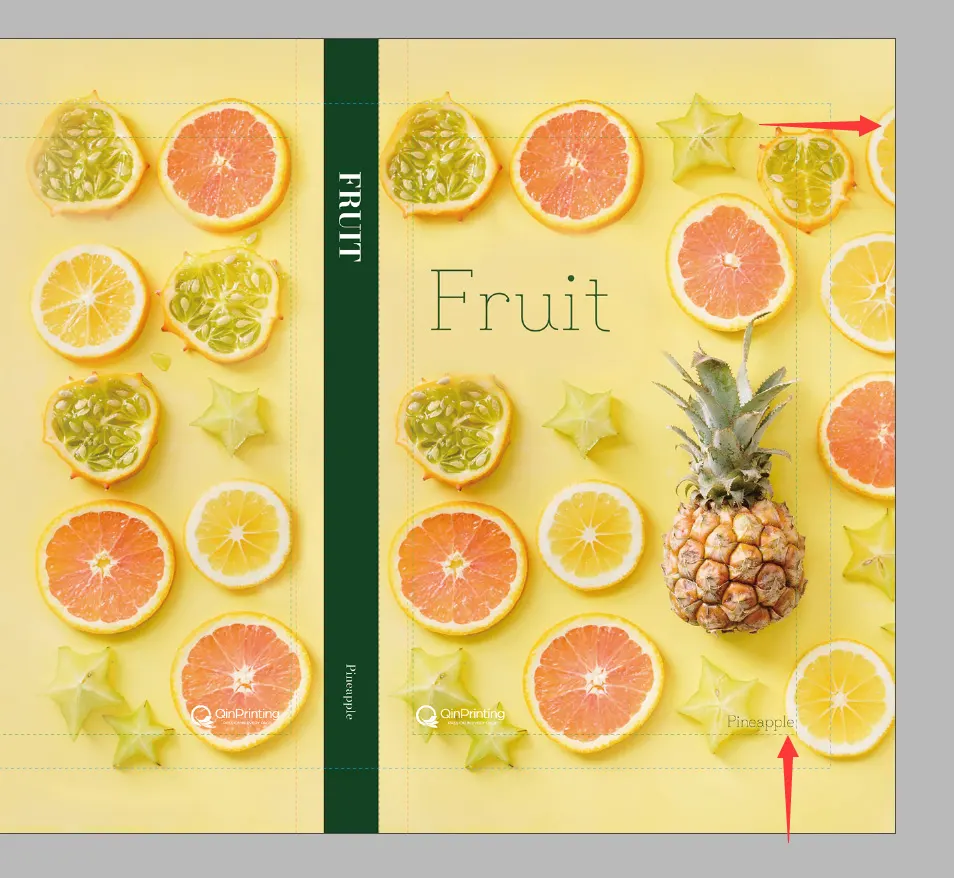
Make certain that all important text, such as the title, author name, and any blurbs, is placed within the green safety zone. This guarantees that no text will be cut off or too close to the edge during printing.
7. Finalize and export
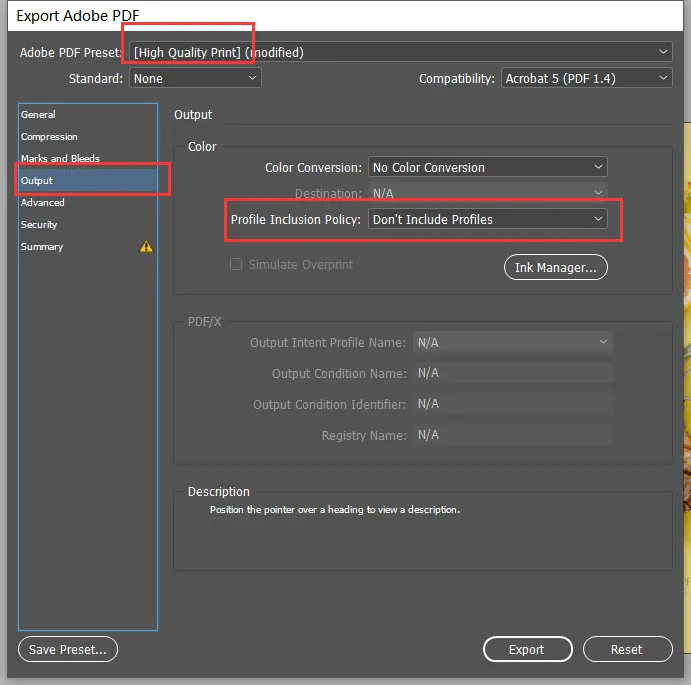
Once your design is complete, hide the template layer and go to “File”, then “Export”. Save the file as an Adobe PDF and choose “High Quality Print” from the export settings. Under “Output” options, select “Don't include profiles” to avoid embedding unnecessary color profiles in the final file.
8. Check font embedding
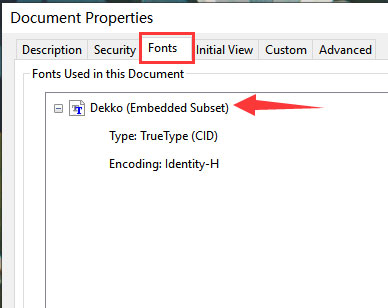
Before submitting your PDF for print, double-check that all fonts are properly embedded. In Adobe Acrobat, open the PDF and go to “File” – “Properties” – “Fonts”. Make sure that all fonts used have the “Embedded Subset” flag. This guarantees that your fonts will display correctly when printed.
Designing a book cover using QinPrinting templates in Adobe InDesign is a straightforward process that allows you to create a professional, print-ready design. Whether you're working on a novel, comic, or coffee table book, using a premade template takes the guesswork out of the technical aspects, letting you focus on creativity. By following the steps outlined above, you can confidently design a book cover that meets the industry standards for print, helping to guarantee a beautiful finished product that showcases your work in the best possible light.
Why use premade book cover templates?
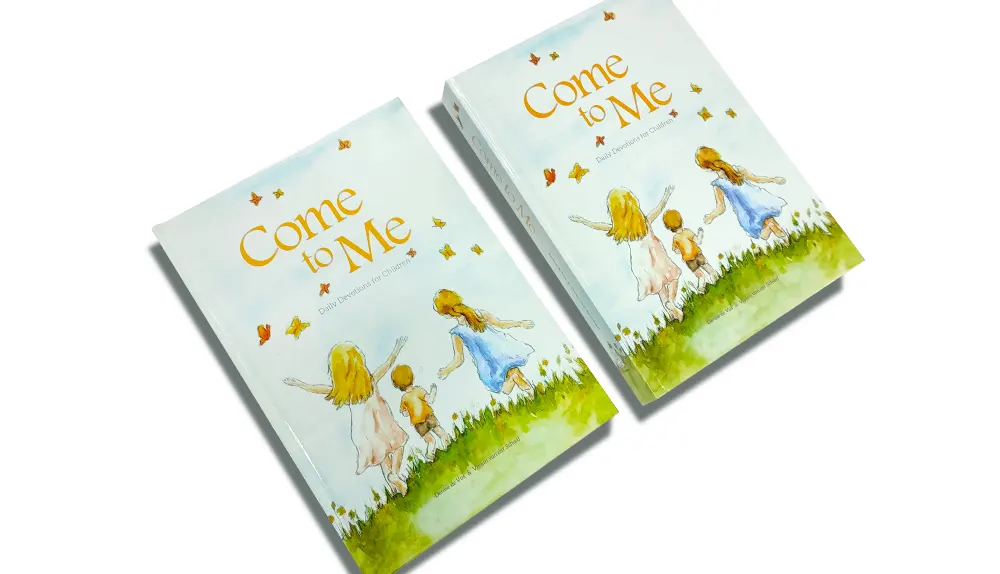
Book cover templates are designed to save you time and help you avoid costly mistakes, particularly when preparing files for print. A premade template already includes all the guidelines you'll need for proper bleed lines, trim areas, and spine dimensions. It's important to get these details right, especially for physical books. Improperly sized covers can lead to printing issues, such as cut-off text or white borders where the design doesn't extend to the edge.
Premade templates are incredibly versatile and can be used across various types of books and print products:
Novels and non-fiction books: The cover of a novel or non-fiction book sets the tone for the content inside. A premade template helps guarantee that your layout is precise, allowing you to focus on selecting the right images, colors, and fonts to attract your target audience.
Comics and graphic novels: These books often require bold designs with dynamic visual elements. Templates make sure that the positioning of the spine, bleed areas, and safety zones is perfect, so your artwork shines without any misalignment during printing.
Children's books: Bright, engaging covers are a must for children's books. Using a premade template allows you to place illustrations and text in a way that appeals to both kids and parents, while also meeting the technical requirements for printing.
Art and photography books: For books where visuals take center stage, templates provide a minimalist structure, allowing the art or photos to be the star. A clean layout and high-quality print standards are important to give your book a polished, professional look.
Coffee table books: Like art and photography books, coffee table books rely on aesthetics. A template guarantees that large images and design elements are aligned and properly sized for a luxury, large-format presentation.
Board game rule books: If you're designing a rule book for a board game, the cover needs to convey the theme of the game while being functional and clear. A template will make sure your design is aligned with the correct print dimensions, helping to guarantee that the cover and spine fit seamlessly.
Talk to us! We're here to help
If you have other questions or need clarification or help with any aspect of preparing your book for print, shoot us an email to [email protected] or just call us on +1 951 866 3971 and we'll be delighted to do all we can to help you.

