We take you through how to design a pro book interior layout step-by-step with text, screenshots, and video instructions
Creating the interior layout for a book can be a challenging task, but with the right tools, the process becomes much more manageable. For independent authors, one of the most effective ways to guarantee a professional look for your book's interior is by using QinPrinting's premade templates alongside Affinity Publisher. Whether you're working on a novel, children's book, or even an art or photography book, these templates offer a simple way to structure your pages for a variety of formats, including paperback, hardcover, and even spiral-bound editions.
Affinity Publisher is a powerful design tool known for its user-friendly interface and comprehensive features. When paired with QinPrinting templates, it provides a seamless experience for setting up book interiors. These templates help make certain that your book's layout adheres to the required specifications for print, guaranteeing accurate results when the time comes to publish your work. In this guide, we'll look into how you can use these templates and explore why they are so important for a wide range of book types and print products.
Step-by-step guide to using QinPrinting interior page templates in Affinity Publisher
1. Download the template
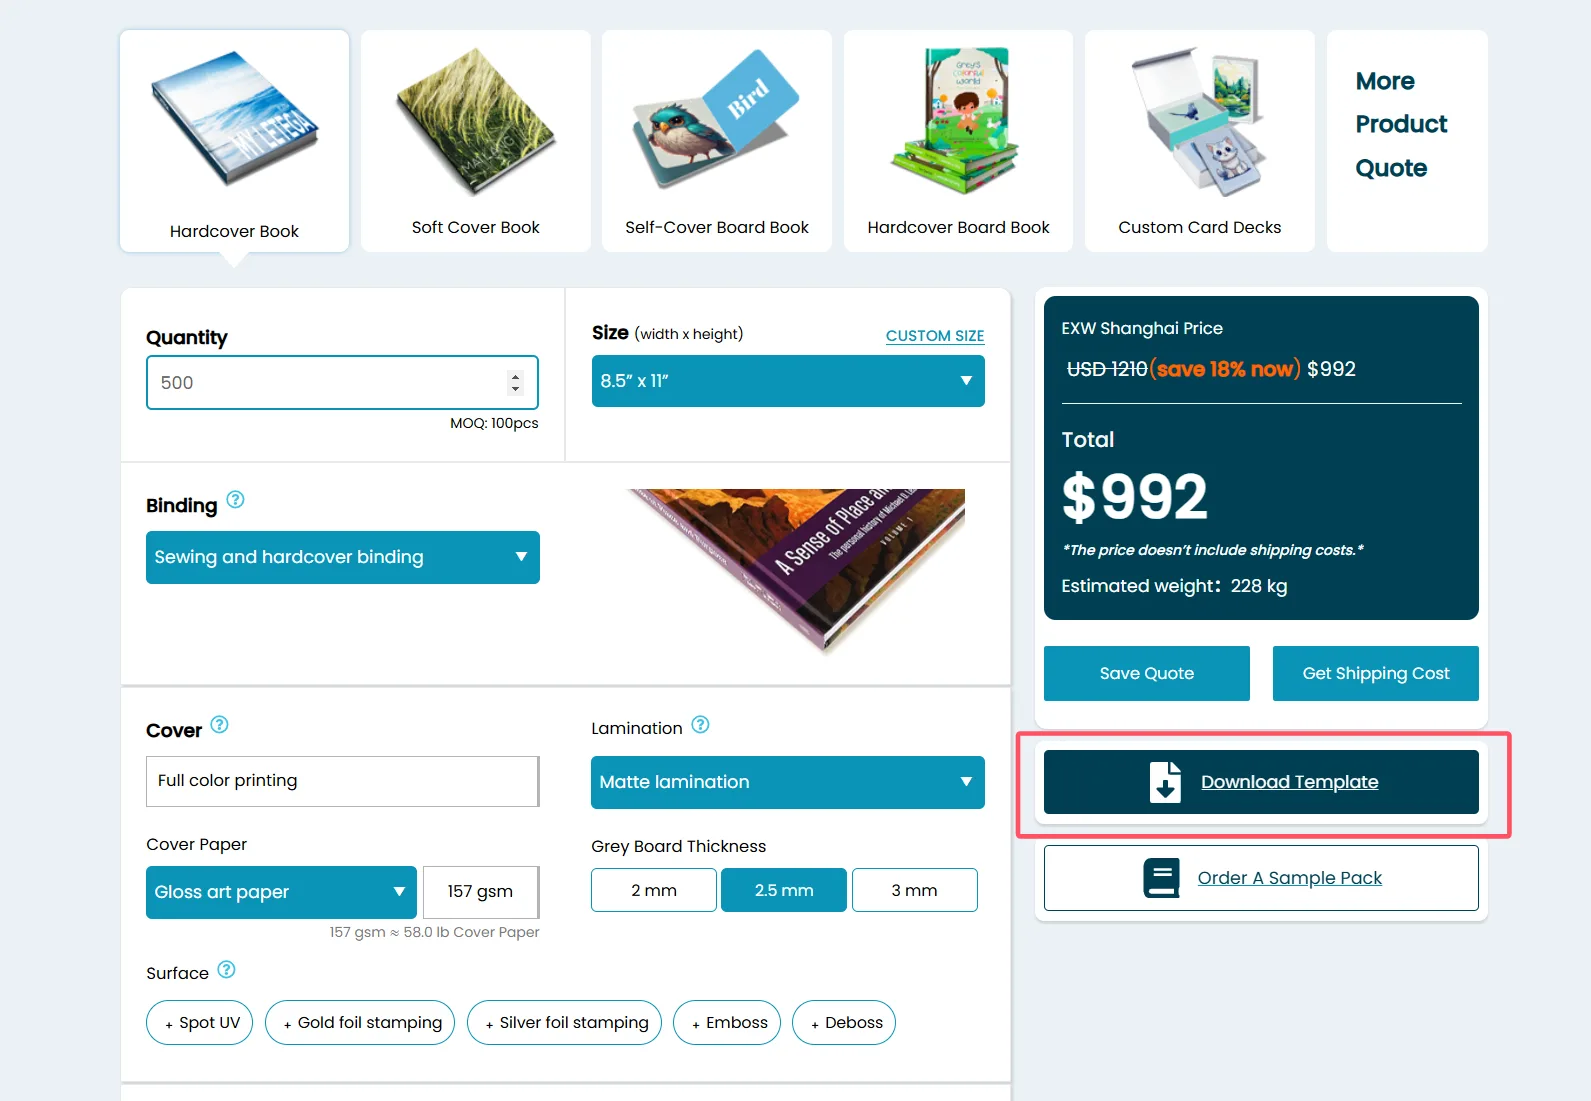
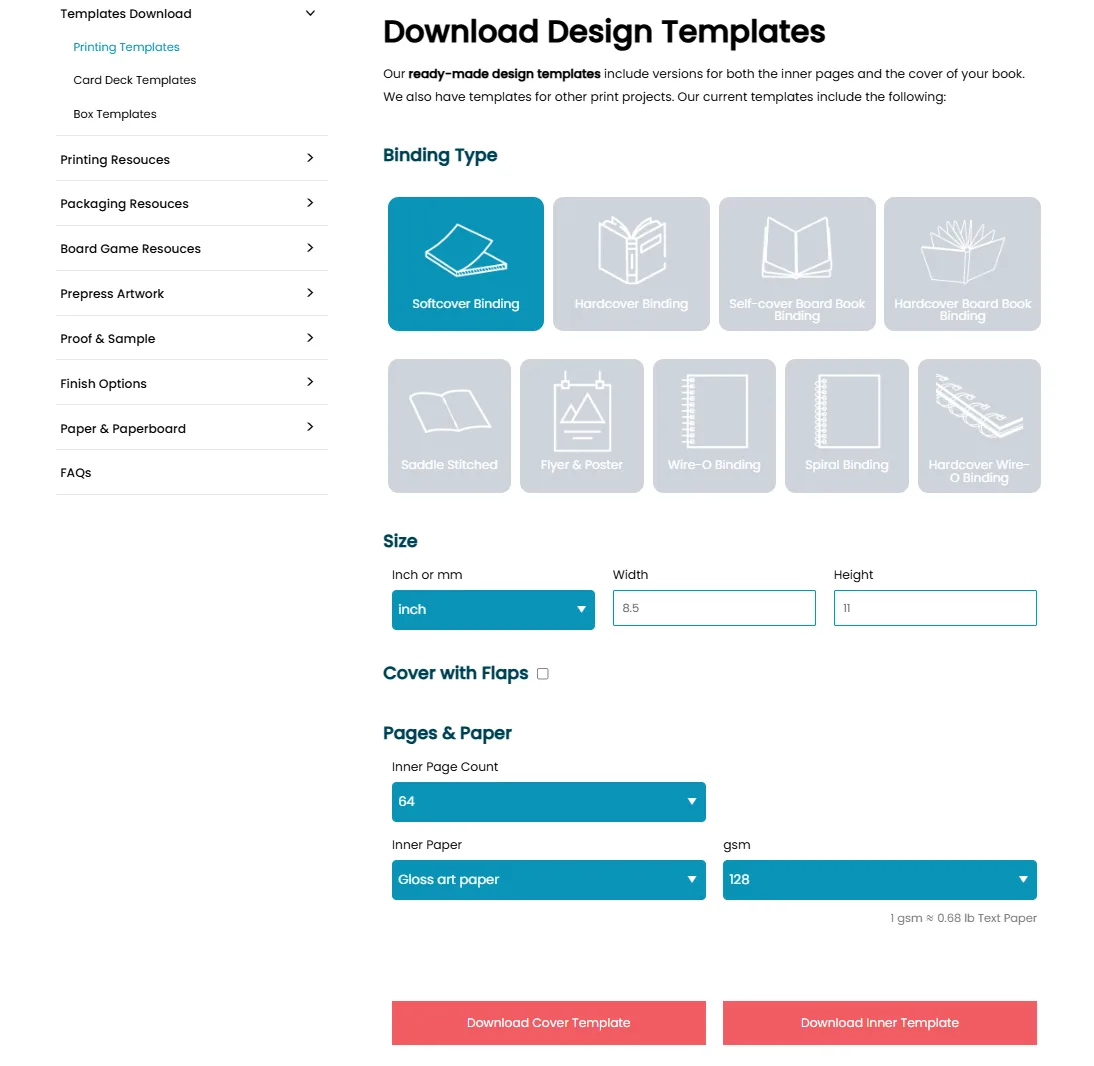
Start by visiting the QinPrinting website and selecting the inner page template that suits your book. The dropdown menus allow you to customize the template based on your book's size, paper type, and binding style. Once you've selected your options, download the PDF template to your computer.
2. Set up a new document in Affinity Publisher
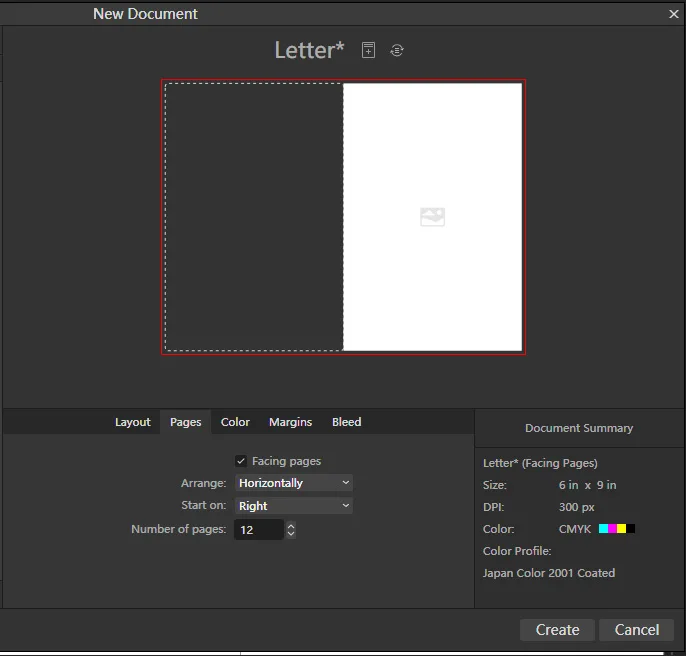
Open Affinity Publisher and create a new document. You'll need to set the page size and resolution to match the dimensions of the template you downloaded. In the document setup, select “Facing Pages” and input the total number of pages your book will have. Make sure to choose “CMYK color mode” and select “Japan Color 2001 Coated” as your color profile. This color profile is best for printed materials and guarantees accurate color reproduction in your final product. For bleed settings, input 0.125 inches, which is necessary for most print projects.
3. Place the template
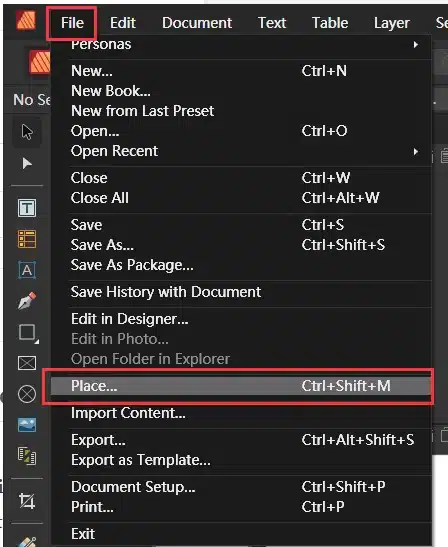
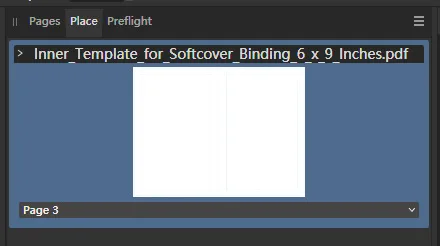
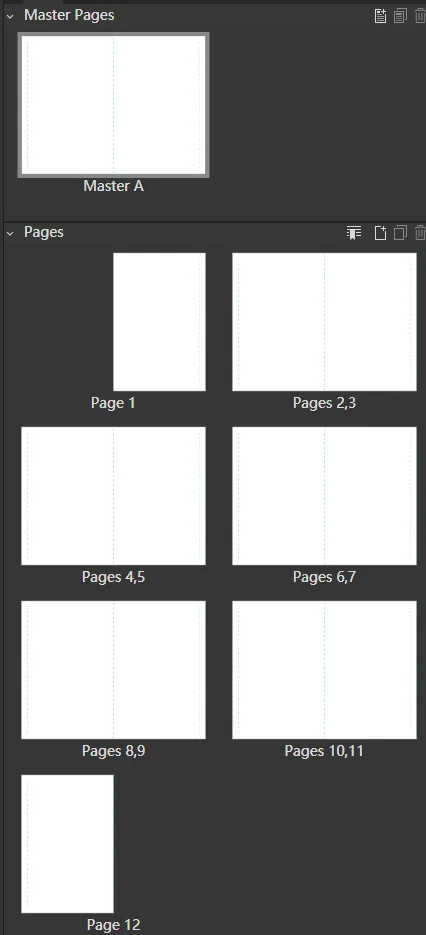
Once your document is set up, go to the “Master Pages” panel and select “Master A.” Then, go to File > Place, and choose the downloaded PDF template. When prompted, select the appropriate page (usually the third page) and place it into the document. Center the template so that it aligns perfectly with the page. You'll notice that the template includes red bleed lines, blue trim lines, and green safety lines, all of which are important for maintaining print accuracy.
4. Setting up non-facing pages (if needed)
If your project doesn't require facing pages—such as wire-o or spiral-bound books—you'll need to adjust the document setup. In the New Document dialog box, deselect Facing Pages.
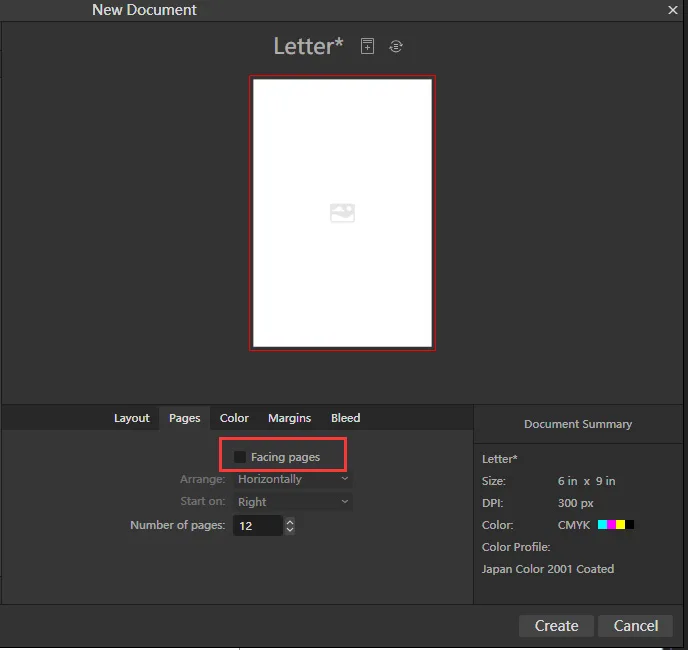
After creating the document, go to the Master Pages panel and right-click to create a new “Master B.”
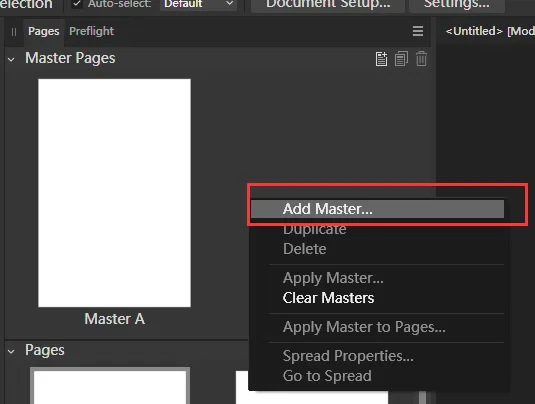
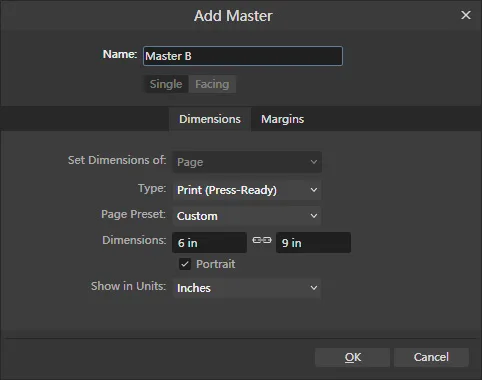
You can then place the second template page on “Master A” and the third template page on “Master B” to differentiate between the left and right pages.
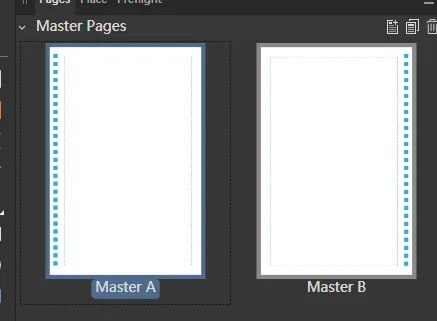
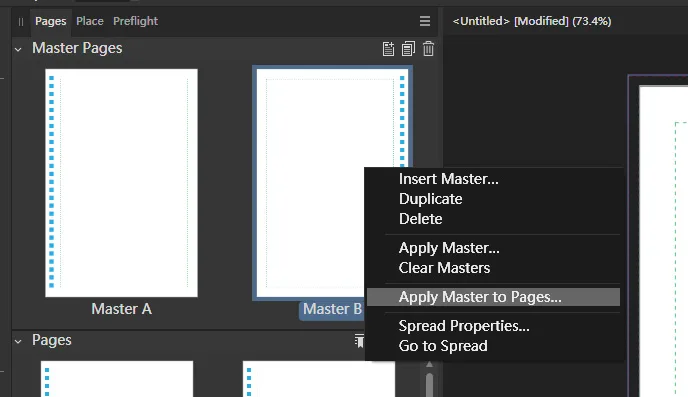
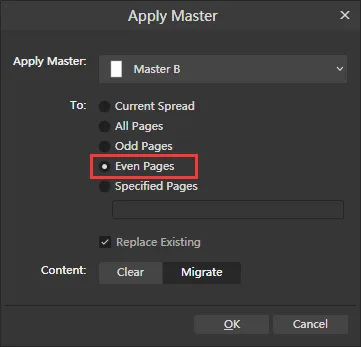
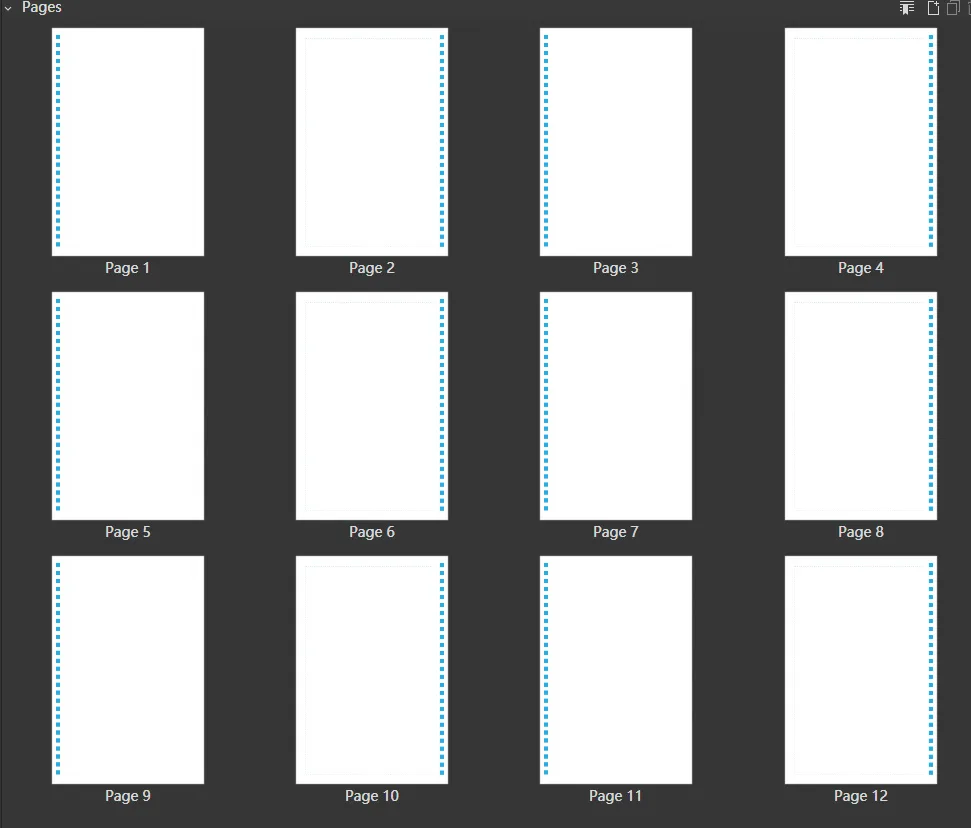
After doing this, right-click on “Master B” and choose Apply Master to Pages for all even-numbered pages. This step guarantees that your layout will alternate correctly for non-facing page projects.
5. Start Designing
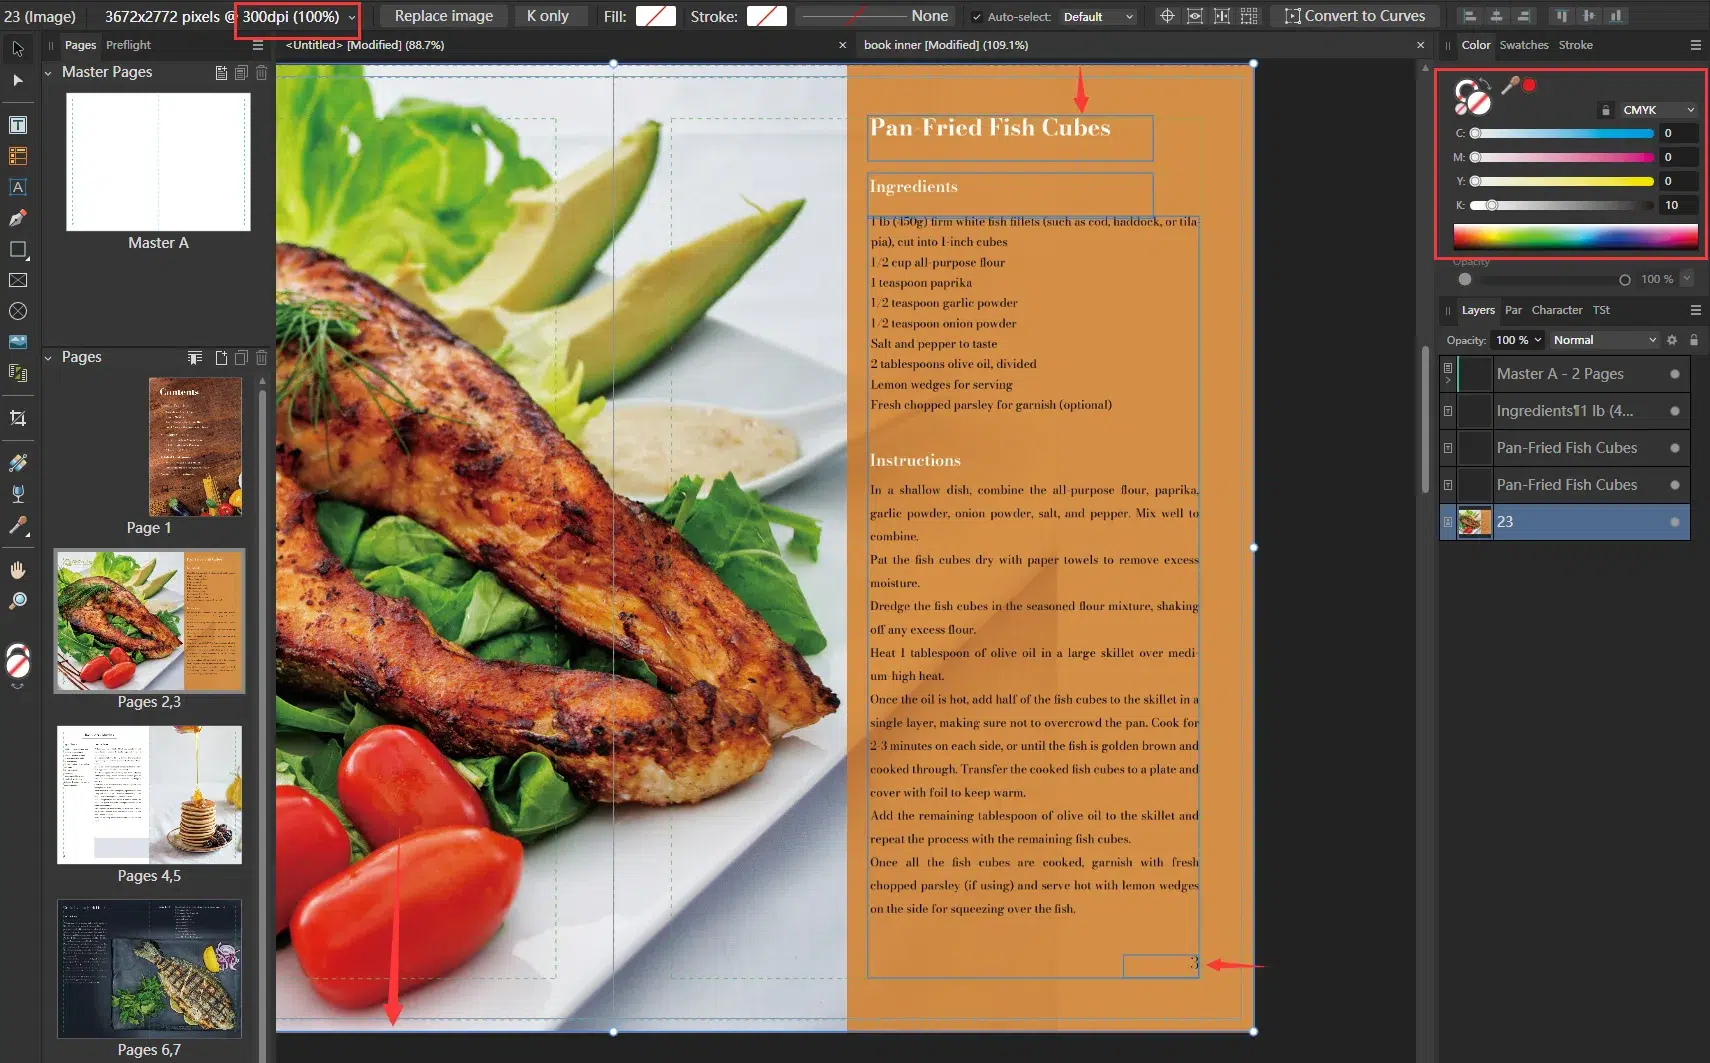
With the template in place, you can now start adding your content. For a professional-quality book interior, it's important to use high-resolution images with an effective PPI (DPI) of 300. You can check the resolution of your images in the “Links” panel, where you'll find detailed information about each image, including its DPI. Extend any background images or elements to the red bleed line to avoid unwanted white borders during printing.
All text and important content should be placed within the green safety zone to avoid being trimmed off. This step is particularly vital for books with a lot of images or detailed graphics, such as children's books, comics, or photography books. Using the CMYK color mode throughout your design helps guarantee that the colors in your printed book match what you see on the screen.
6. Finalizing the Design
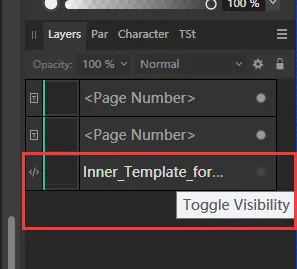
Once you've finished designing your book interior, it's time to prepare the file for export. First, go to the “Master Pages” panel and hide the template layer. This will remove the visual guidelines from your final design but keep your content in place.
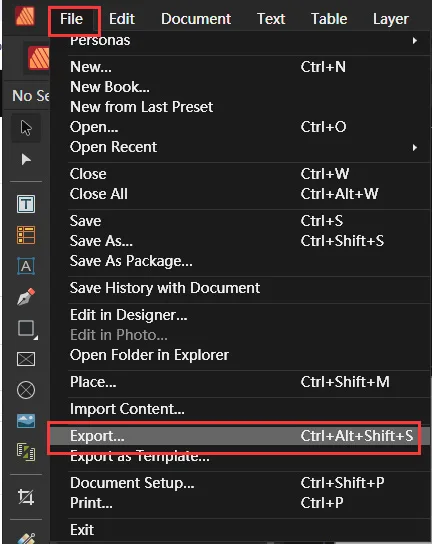
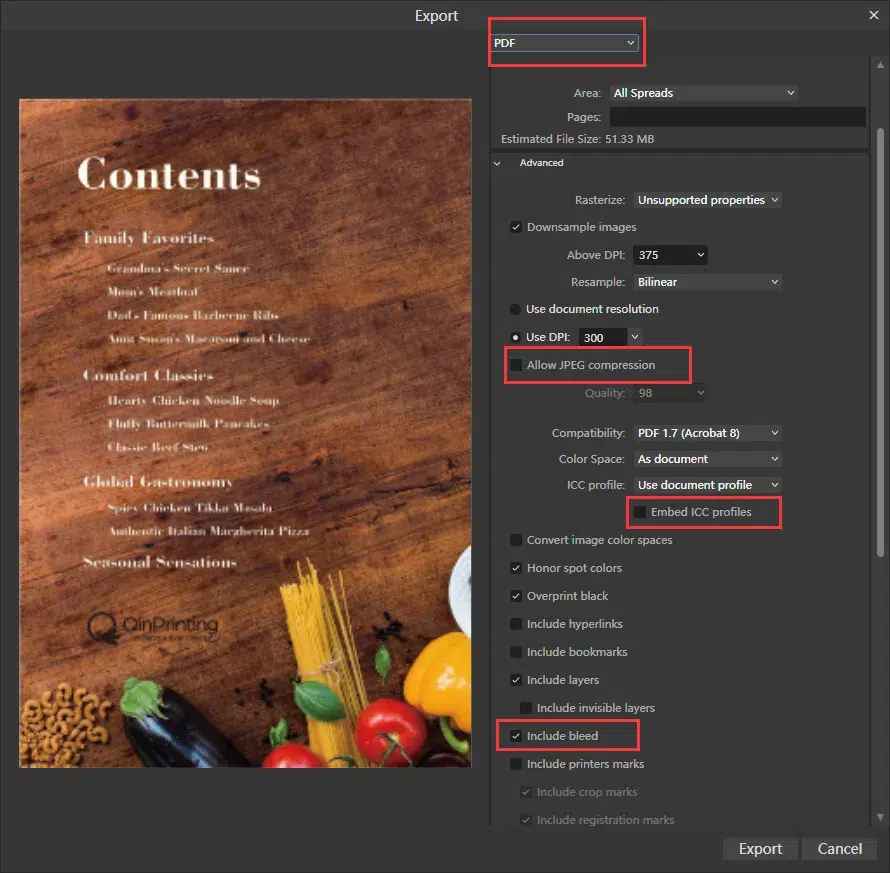
Next, select “File > Export”, and choose “PDF (for print)” from the settings panel. Disable “JPEG compression” and uncheck the “Embed ICC profile box”, as this can cause issues with color profiles during printing. Make sure to check the “Include Bleed” box to include the necessary bleed areas in your final PDF. This step is important for print accuracy.
7. Check Font Embedding
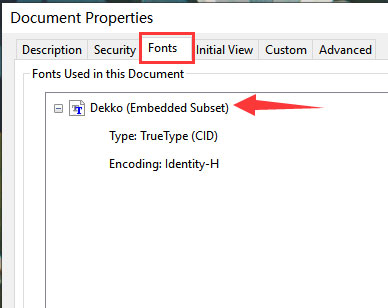
Before submitting your file for print, it's necessary to check that all fonts used in your document are properly embedded. To do this, open the exported PDF in Adobe Acrobat, then go to “File > Properties > Fonts”. Look for the “Embedded Subset” flag next to each font name. This guarantees that your fonts will display correctly, even if the printing service doesn't have the same fonts installed.
Designing a book interior using QinPrinting's premade templates in Affinity Publisher is a simple and effective way to make sure your book is print-ready while maintaining creative control. These templates not only save time but also help guarantee that your book adheres to the required print specifications. Whether you're working on a novel, an academic textbook, a graphic novel, or a children's picture book, QinPrinting's templates provide the structure and guidance needed to produce a high-quality finished product.
By following these steps, you'll be able to confidently design a book interior that meets industry standards, ensuring your work is professionally formatted and ready for publication. From setting up the document to finalizing the export, each part of the process plays an important role in making certain that your book looks its best when printed.
The advantages of using premade templates
When designing a book's interior, you'll need to follow specific guidelines to avoid formatting errors during the printing process. QinPrinting templates already have the necessary bleed lines, trim lines, and safety zones included, making them a vital resource for independent authors who may not be familiar with professional printing requirements. Here are some key benefits of using premade templates for your book interior:
- Precision and consistency: By using a template, you're guaranteed to maintain consistent margins, bleed, and trim lines across all pages, making sure your design aligns perfectly with the print specifications.
- Time-saving: With premade templates, you don't need to start from scratch. Instead, you can focus on adding your content, images, and other elements without worrying about technical setup.
- Professional results: Whether you're working on a comic, graphic novel, academic book, or coffee table book, a template helps give your project a polished and professional look.
- Versatility: These templates can be used for various book formats, from novels to children's books to rule books for board games. They work across different binding methods and book sizes, allowing flexibility in your project.
Now that we've examined why using templates is so important, let's go through the step-by-step process of how to use a QinPrinting interior page template in Affinity Publisher.
Talk to us! We're here to help
If you have other questions or need clarification or help with any aspect of preparing your book for print, shoot us an email to [email protected] or just call us on +1 951 866 3971 and we'll be delighted to do all we can to help you.

