Our guide to preparing print-ready files in QuarkXPress with video, text, and screenshots
While we mostly recommend using the Adobe Creative Suite to prepare your files for printing, we acknowledge that several of our clients are more familiar with QuarkXPress. So, in this guide we'd like to walk you step-by-step through the process of setting up your document—whether that's a book, brochure, game component, or anything else—for print design and exporting it as a print-ready PDF file using your favorite software. Whether you're an experienced designer or a beginner, understanding these steps will help you create professional-quality print documents with minimum hassle.
Introduction to QuarkXPress
QuarkXPress is a powerful desktop publishing software widely used in the graphic design industry. Known for its versatility and robust feature set, QuarkXPress enables users to create complex page layouts for various types of publications, including books, magazines, and brochures. One of the significant advantages of QuarkXPress is its ability to handle high-resolution graphics and accurate typography, making it an excellent choice for preparing print-ready files.
Advantages of using QuarkXPress
- Precision and control: QuarkXPress provides excellent standards of precision in layout and design, allowing you to have complete control over every aspect of your project. This precision is vital for creating print materials where accuracy in placement and dimensions is essential.
- Professional output: The software supports high-resolution graphics and advanced color management, helping the printed output match the digital design. This feature is particularly beneficial for maintaining color fidelity and print quality.
- Flexibility: QuarkXPress is highly adaptable, supporting various file formats and integrating reasonably smoothly with other design tools. This flexibility is invaluable for designers who need to import assets from different sources or export files in specific formats.
- Efficiency: The software offers numerous productivity features, such as reusable content components and automated layout adjustments. These tools help streamline the design process, saving time and reducing the likelihood of errors.
Setting up your document
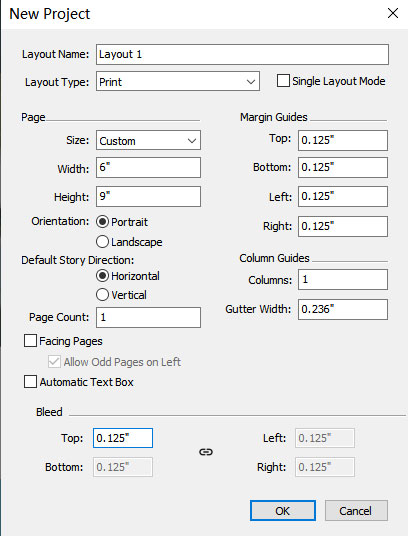
1. Create a new project: Open QuarkXPress and click on “File” > “New Project”. Define the dimensions of your project based on the finished size of your printed product. Remember to add extra space for margins and bleed areas. Typically, we recommend a bleed of 0.125 inches (approximately 3 mm) on all sides.
2. Bleed and safety zone: Save the newly created document and then open it into the workspace. In the workspace, the white area represents the finished section, and you'll also see red lines that indicate the bleed extent, and blue lines which highlight the safety zone.
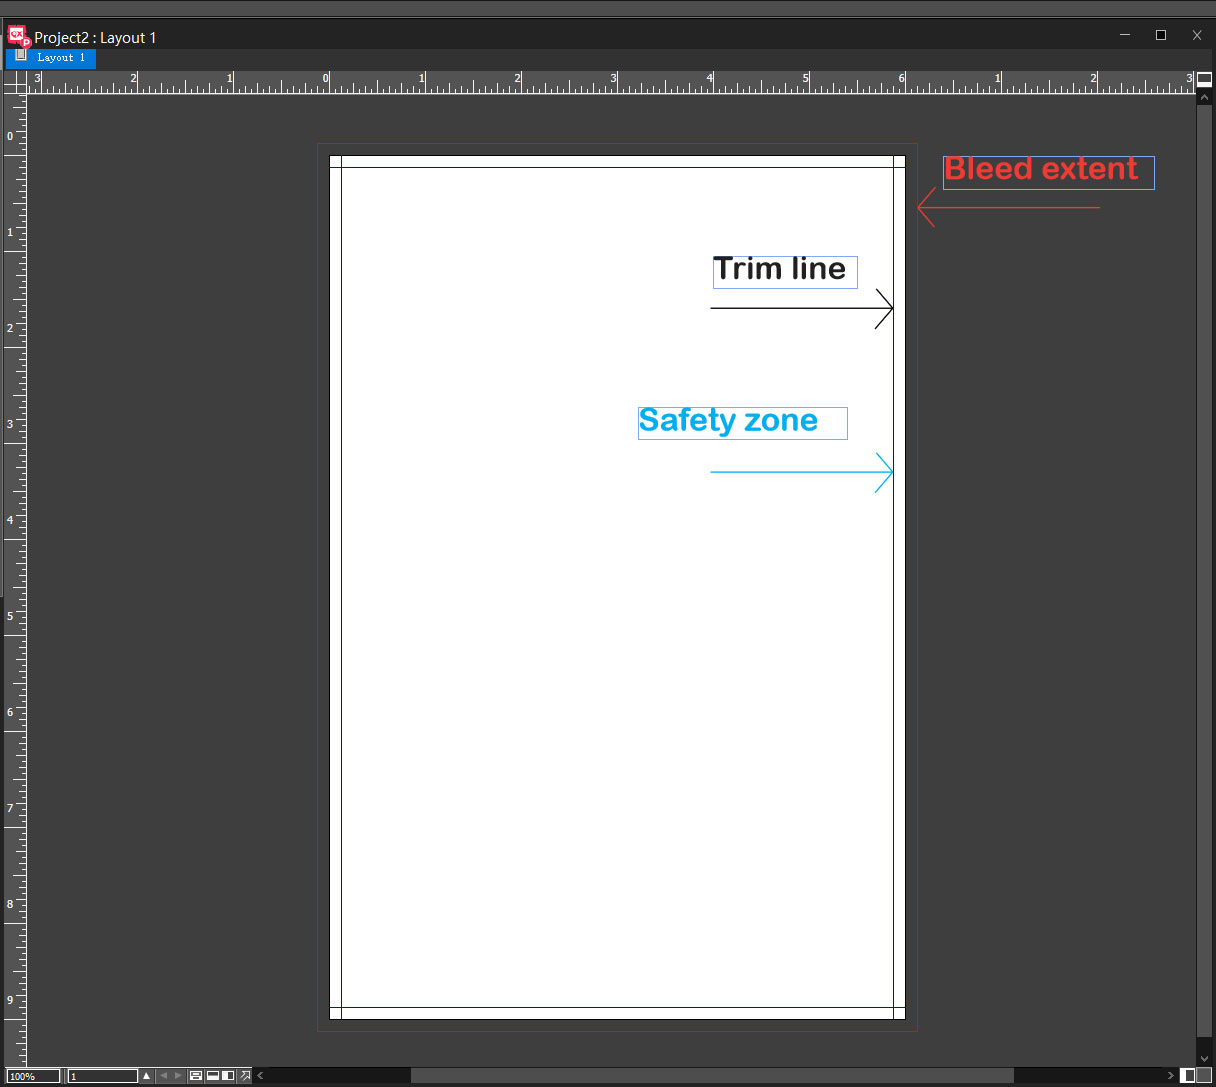
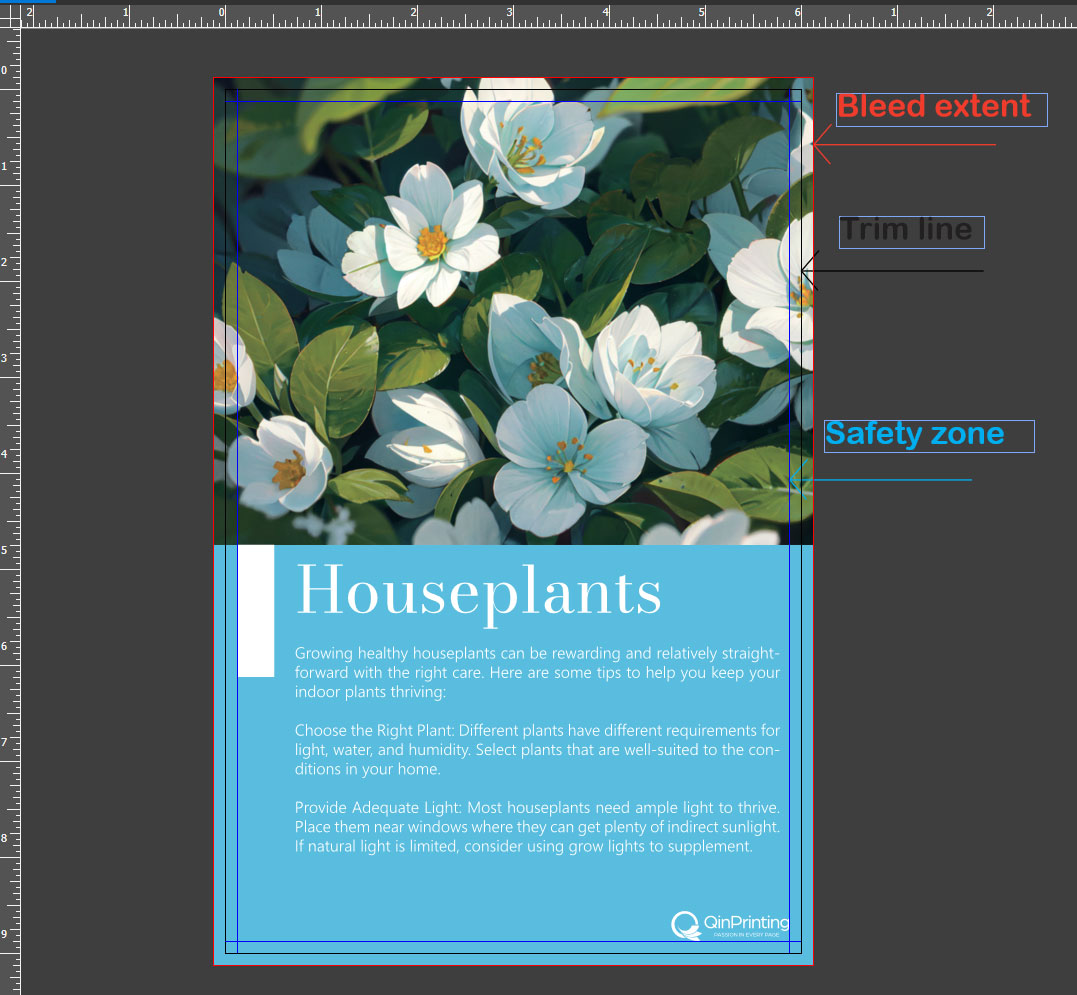
3. Designing with bleed and safety zones: Extend any background images to cover the bleed area and place all essential elements, such as text and essential artwork, within the safety zone. The trim line, represented by the boundary of the white area, indicates where the document will be cut during post-print processing. Extending images to fill the bleed area prevents unwanted white lines, while keeping important content within the safety zone avoids accidental trimming.
Working with colors and images
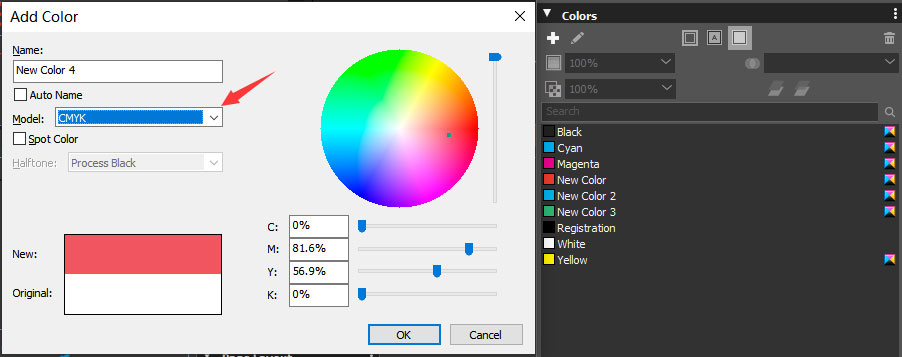
1. Use CMYK color mode: Always work in CMYK color mode for print projects. CMYK stands for Cyan, Magenta, Yellow, and Key (black), which are the standard colors used in the printing process. This color mode helps maintain accurate color reproduction in the final printed product.
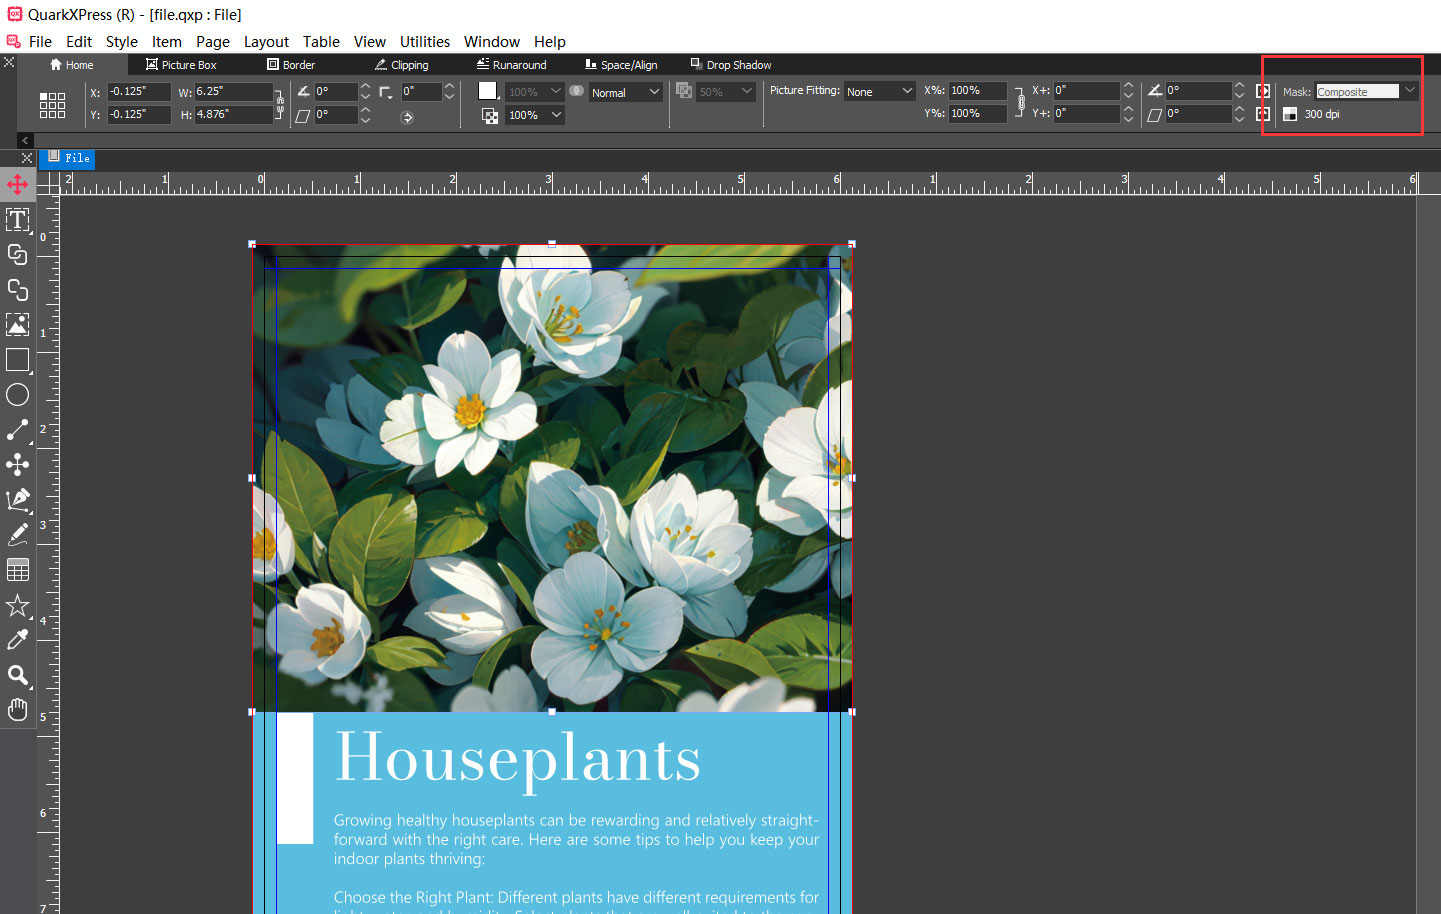
2. Set high resolution: All images and graphics should have a resolution of at least 300 dpi (dots per inch). Images with lower resolutions may appear pixelated or blurry when printed. You can check the effective image resolution in the picture box panel within QuarkXPress.
Exporting your document as a PDF
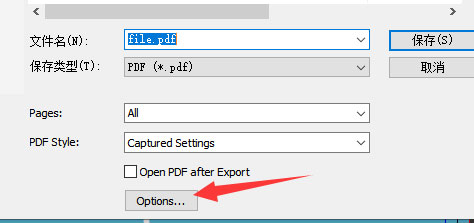
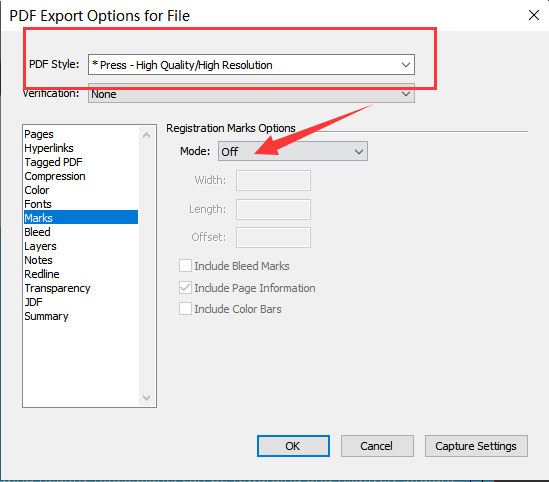
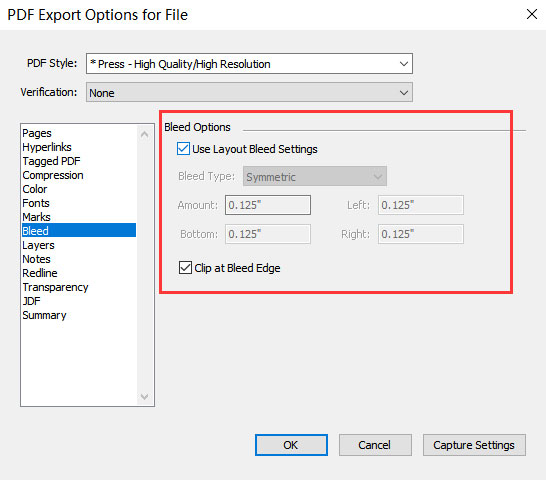
2. Configure export options: In the options window that appears, select “Press – High Quality/Resolution” to achieve the highest quality for your printed document. Under the “Marks” section, choose “Mode – Off” to avoid printing the bleed and trim lines. For the “Bleed” section, select “Use Layout Bleed Setting” to include the bleed area in the final PDF.
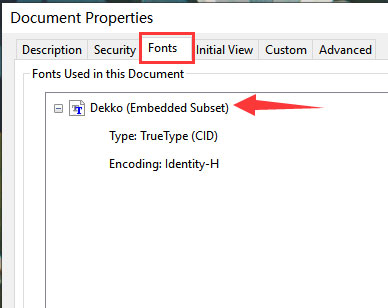
3. Save and review: Save the PDF file and manually review it for any errors. Open the saved PDF and check that the size includes the bleed area. Verify the fonts by clicking on “File” > “Properties” to confirm that all fonts are embedded. Look for the “Embedded Subset” flag to verify this.
Final steps and tips
1. Naming and organization: Give your file a clear and descriptive name to avoid any confusion during the printing process. Organizing your files and maintaining a consistent naming convention can help streamline communication with our press people.
2. Proofreading and quality check: Before sending the file for printing, conduct a thorough proofreading and quality check. Make sure that all text is accurate, images are correctly placed, and colors are consistent.
3. Communication is good: Provide any specific instructions or requirements to us or discuss particular needs as soon as possible. Clear communication helps avoid misunderstandings and guarantees that the final printed product meets your expectations.
Need more help? Talk to us!
By following these steps, you should be able to produce print-ready files using QuarkXPress software with confidence. The precision, control, and professional output capabilities of QuarkXPress make it an excellent choice for any print design project. But if you have any questions or need further assistance, our expert team is always here to help. We have almost 30 years of industry experience and work with major mainstream publishers as well as independent creatives all over the world. Our global reputation for excellence is based not only on the high quality of our work and state-of-the-art print technology in our Shanghai-based facilities, but also on our genuine commitment to personalized customer care.
Shoot us an email to [email protected] or call us at +1 951 866 3971 and we'll be delighted to discuss your needs.

