To avoid losing text and images in your final printed books, you must set the gutter and margin values correctly. We explain how using Adobe InDesign.
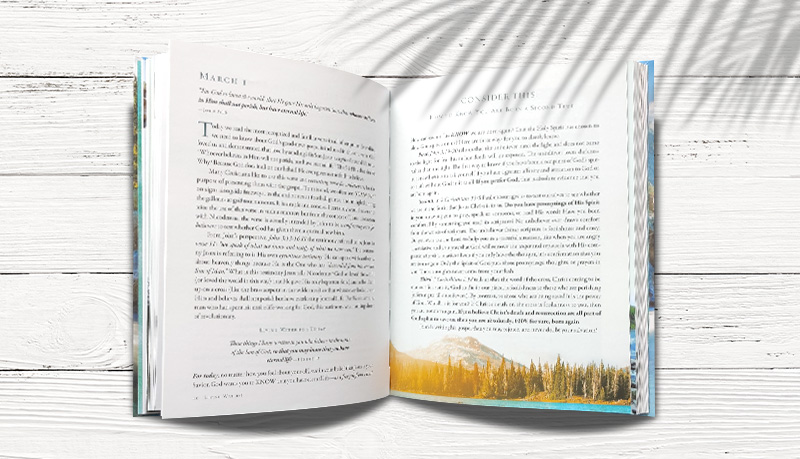
In print book layout and design, the gutter and margins are essential elements that affect the readability and aesthetics of the book. Here's what they refer to:
What are margins?
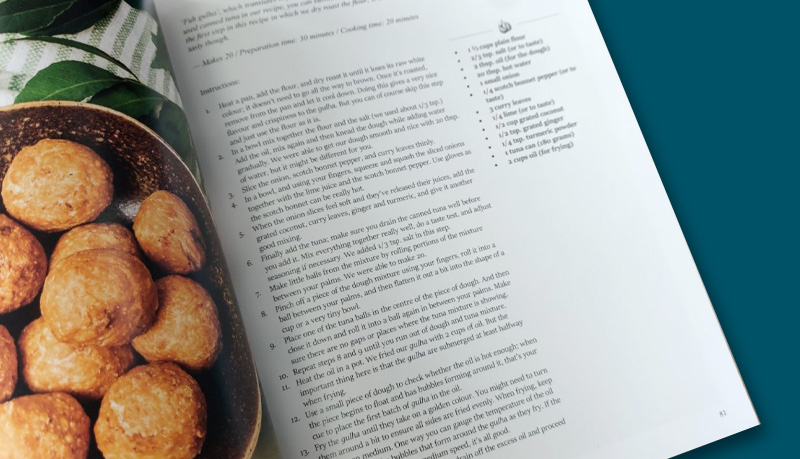
Margins are the blank spaces surrounding the content of each page. They are typically measured from the edge of the paper to the main body of text. Margins serve several purposes:
- Aesthetics: Margins provide breathing room for the text, making the page look balanced and pleasing to the eye.
- Readability: Ample margins prevent text from running too close to the edge of the page, making it easier to read without straining the eyes.
- Practicality: Margins also provide space for readers to hold the book comfortably without covering any text.
Margins can vary in width depending on the design preferences and the type of book being created. However, common margin widths for a standard print book are typically around 0.5 to 1 inch (1.27 to 2.54 centimeters) on all sides.
What is the gutter?
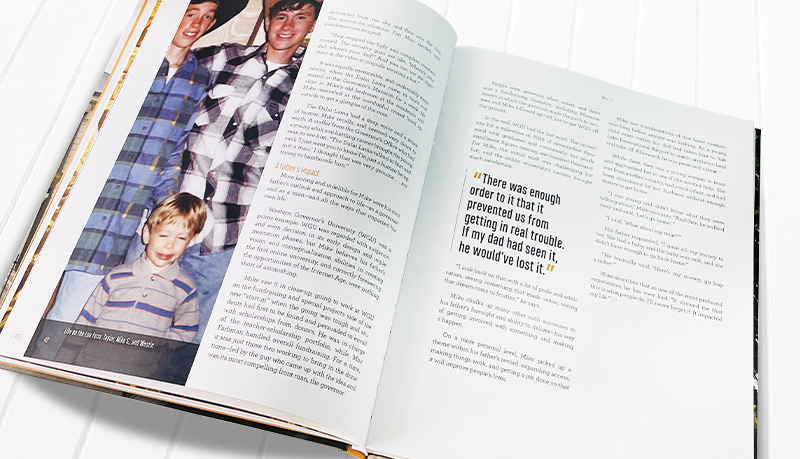
- The gutter is the inner margin or blank space between facing pages in a book, where the pages are bound together.
- The gutter allows for the binding of the book. When the book is opened, the text near the inner margin can be difficult to read if it's too close to the binding. Therefore, the gutter width must be wide enough to accommodate this and prevent any loss of readability.
- Gutter width depends on factors such as the thickness of the book, the type of binding used, and the paper weight. In general, larger books or books with tighter binding require wider gutters to ensure that text remains legible.
In professional book design, pay careful attention to margins and gutters to make sure that the text is easy to read and aesthetically pleasing. Additionally, digital tools such as layout software often provide templates and guidelines to help designers set appropriate margins and gutters for different types of books. And at QinPrinting, we have a range of ready-made templates you can use to guide you in your book layouts.
Gutters for paperbacks and hardcover books
When setting gutter values for perfect bound paperback books versus hardcover books, there are differences to consider due to the distinct characteristics of each binding method.
Perfect bound paperback books have a glued spine compared to hardcover books which are based on sewn signatures. This difference can affect how much the pages will curl toward the gutter. So, in most cases, perfect bound books may need a little more gutter space than hardcovers. The exception would be with sewn paperbacks which can lay flat when open without damaging the spine and have significantly less gutter loss.
Considering these differences, here are some general guidelines:
- For perfect bound paperback books, it's often recommended to have wider gutters to accommodate the flexibility of the spine, potential page curl, and the need for text to remain readable despite wear and tear.
- For hardcover books, while the gutter may not need to be as wide due to the rigidity of the spine and reduced page curl, it's still important to provide sufficient space to maintain readability, especially considering the opening angle limitations and potential for binding interference.
Ultimately, the gutter width for both types of books should be determined based on factors such as book size, page count, paper thickness, and reader comfort, while making sure that text remains clear and legible throughout the book's lifespan.
How to set up gutters and margins in Adobe InDesign
Here are the technical steps to set up margins and gutters when designing a book using Adobe InDesign:
Create a new document
- Open Adobe InDesign and create a new document by going to File > New > Document.
- Set the document's page size, orientation, and number of pages according to your book specifications.
How to set margins
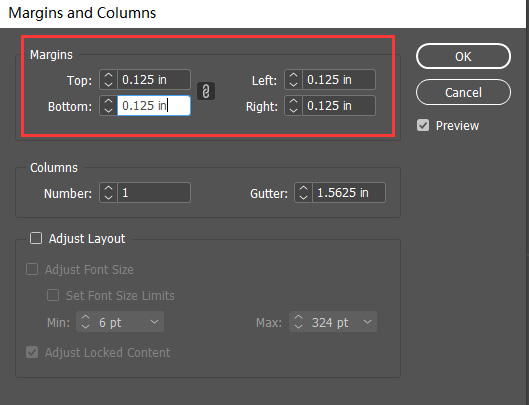
- In the New Document dialog box, you can set the margins under the Margins section.
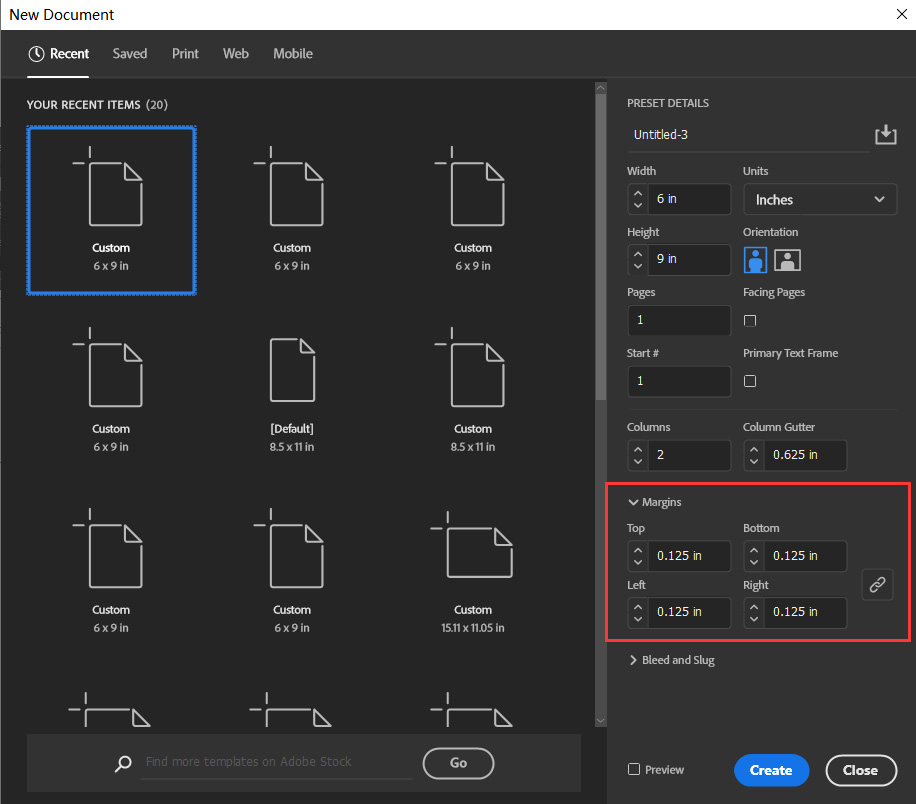
- Alternatively, if you're working on an existing document, you can adjust margins by going to Layout > Margins and Columns.
- Enter your desired values for the Top, Bottom, Left, and Right margins. These values will determine the blank space surrounding the content on each page.

How to set gutters
Gutters are set up differently depending on whether you're working on facing pages (such as in a print book layout) or between columns.
To set up gutters for facing pages
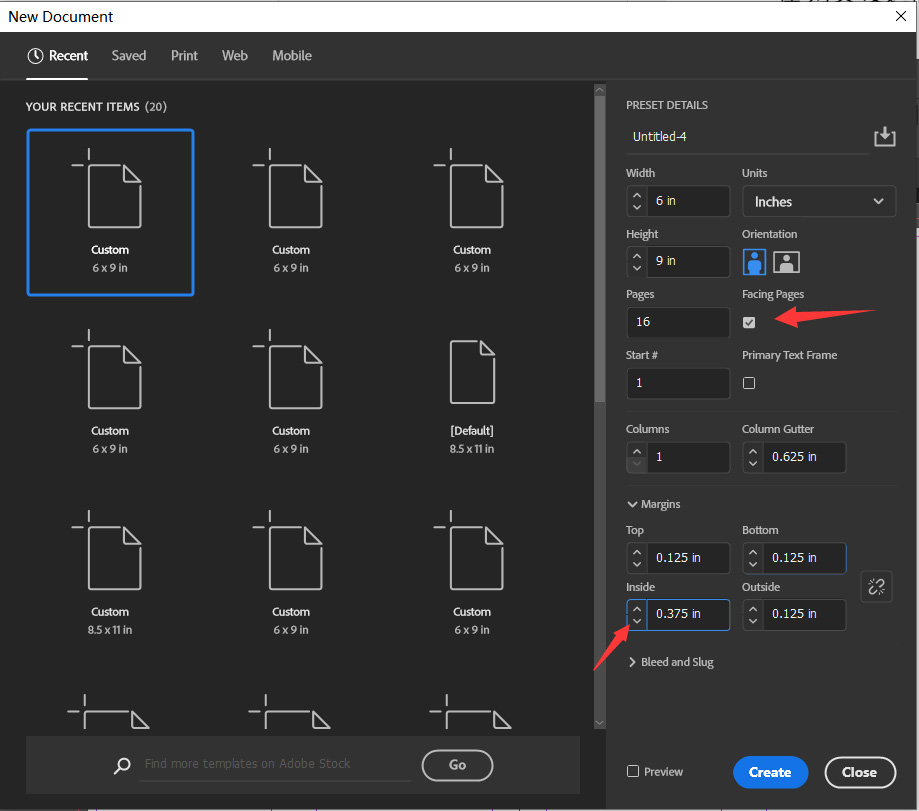
- In the New Document dialog box, click on the “Facing Pages” checkbox to enable it if you haven't already.
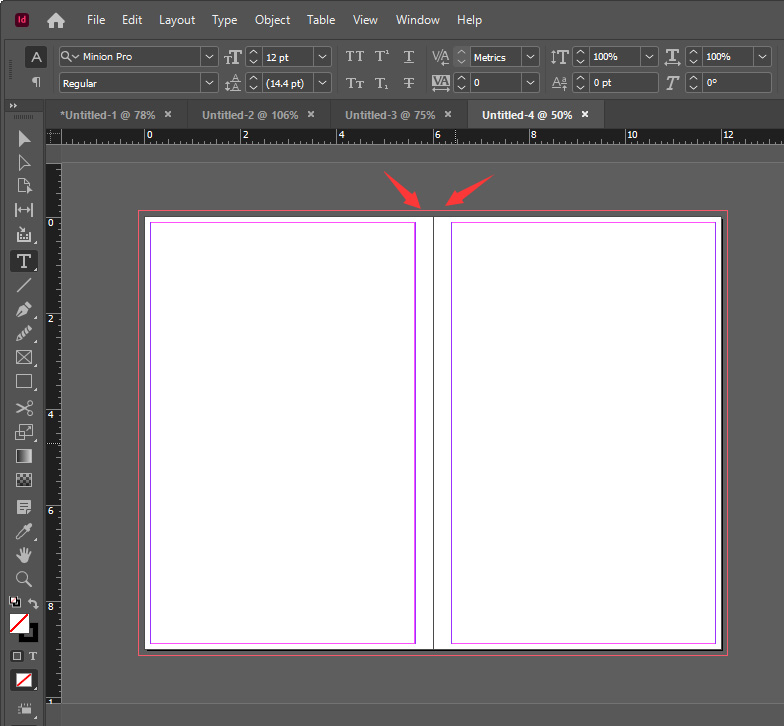
- Beneath the Facing Pages checkbox, you'll find options for “Inside” and “Outside” margins. The “Inside” margin is the gutter.
- Enter your desired value for the gutter width in the “Inside” margin field. This will determine the space between facing pages where they meet at the spine.
To set up gutters for columns
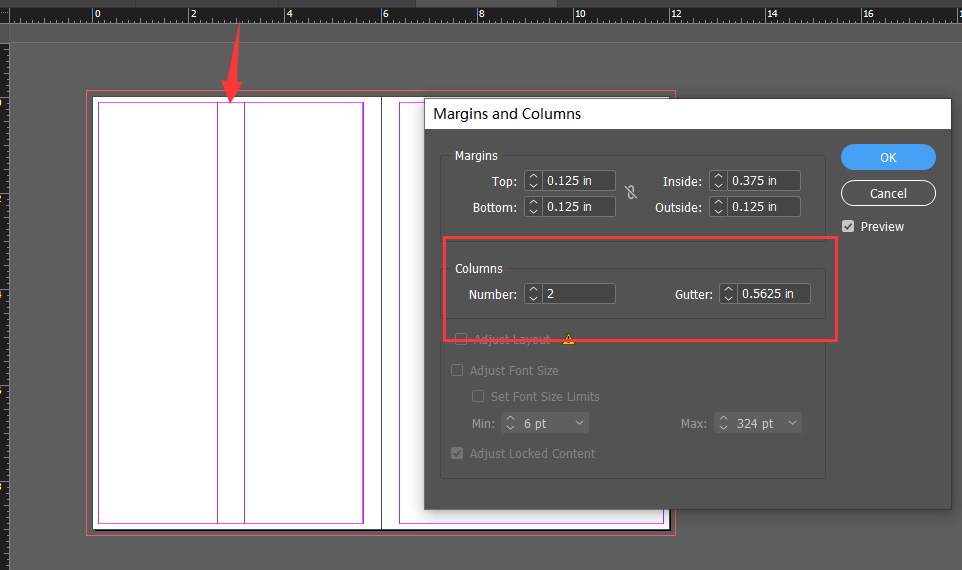
- If you're working with multiple columns, the gutter value will determine the space between columns.
- Go to Layout > Margins and Columns.
- Adjust the values in the “Gutter” field.
Apply margins and gutters
- Once you've set up your margins and gutters, click OK to create the document with these settings.
- InDesign will apply the specified margins and gutters to your document pages
- After setting up your margins and gutters, you can always adjust them later by going to Layout > Margins and Columns or by using the Page Tool to directly adjust page dimensions and margins.
By following these steps, you can effectively set up margins and gutters for your book design in Adobe InDesign, guaranteeing that your layout meets needed specifications and design requirements. While gutter values can vary depending on bindings, pages numbers, and the thickness of the paper, as a rule of thumb, 0.5 to 1 inch (127 to 254 mm) is usually sufficient.
Talk to us!
Here at QinPrinting, our experts take great care to check every single file submitted by our clients. If they find any errors, they'll either fix them if they're small or explain to you what the problems are and offer detailed advice to help you fix them yourself. We'll never print your project—be it a book, a brochure, a board game, a packaging solution or anything else—until we're 100% satisfied that you'll get a perfect result.
But we do get client-prepared files with errors in them. Several of the most common errors are no bleed or trim lines, misaligned layers, no mask files for holographic printing, embossing, and foil stamping, or inappropriate file types. And a quick assessment suggests that clients who are more likely to struggle to prepare their print files accurately are those who don't get in touch with us for advice and guidance first. So, unless you are an expert graphic designer familiar with producing files for offset printing, please get in touch with the start of your project. We have a vast amount of experience and expertise to make available to you and you'll find our team patient, friendly, and responsive at every stage of your printing journey. So, contact us today to chat through your needs, get design advice, or ask us for a no-obligation quote. We're here to help!

