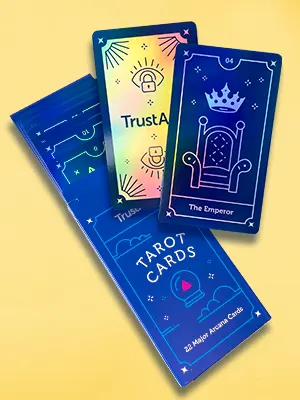
Glow in the Dark Printing
What could be more fun for your print project than ink that glows in the dark? Superb for horror comics, spooky book covers, Halloween event brochures and much more, we offer a fantastic glow-in-the-dark printing service for all your needs.

Here, we explain what glow-in-the-dark printing is, how it works, and how to prepare your design files for glow printing. Whether you are printing books, brochures, posters, comics, packaging or anything else, we have a glow-in-the-dark printing solution that's right for you.
What is Glow-in-the-Dark Printing?
Glow-in-the-dark printing is a specialized technique which results in areas—text, images, graphics—which absorb light during exposure to a light source such as sunlight or an electric lamp and then emit the light in the dark. The technique involves preparing a careful mix of ultraviolet (UV) inks and phosphorescent compounds. These are then printed onto the substrate using screen printing technology. When deciding which areas of your product you would like to be treated with glow-in-the-dark inks, bear in mind that the phosphorescent compounds we use will also give the text or image a slightly grainy texture.

Glow-in-the-Dark Printing Features
Glow-in-the-dark inks have certain special features about which you should know before you begin to design with them in mind. To help you, here's a list of the key features you'll find useful. Please bear these in mind as you plan your design.
- You'll see the glowing effect most clearly if you print the glow-in-the-dark ink on a lighter colored image or lighter colored background. Whereas, if you print it onto a darker background it will be less evident.
- Glow-in-the-dark ink will not be visible on a pure black or very dark background, so it's best to avoid this in your design.
- The optimal background for the strongest, brightest glow-in-the-dark effect is white.

So, while you can get a good glowing effect on colored areas, they should always be lightly colored. The strongest effects will always come through on white backgrounds. Avoid black or very dark backgrounds altogether if you want to print with glowing inks.
How long does the glow last?
The answer to this question depends on how long the print is exposed to light before viewing it in darkness and the intensity of that light. So, typically, you can expect the print to emit a faint glow after as few as 20 or 30 seconds of exposure to moderate intensity light. On the other hand, if it's been in the light for over 45 minutes, you'll get a very bright glow that will last a couple of hours. In short, the longer the exposure time and the brighter the light, the better and longer the resulting glow.
In terms of the longevity of the printed glow effect overall, that's more variable. With normal exposure times and use, most glow-in-the-dark printing will still work well even after a year of use. Although, you may find that after a few years, the glow effect starts to diminish. So, while it lasts a long time, it doesn't last forever.
What products are good for glow-in-the-dark printing?
Almost any product with a suitable surface can be used with glow-in-the-dark printing techniques. That said, certain projects and products are better suited and certainly more popular. Here's a quick overview of the ways that our clients have successfully applied glow-in-the-dark printing:
- Art prints
- Comic books
- Game cards and other board game components
- Book covers
- Boxes and packaging
- Posters
If you have a print project in mind and it's not listed here, just get in touch and we'll see what we can do! In most cases, if it can be printed normally, then it can also be printed with phosphorescent ultraviolet ink compounds, too. If you're not sure, the best thing is just to talk to us. We're always here to help.
How to prepare artwork files for glow-in-the-dark printing
1. Open your design in a suitable application – Open your print design in a vector-based software if possible. We recommend either Adobe Illustrator or Adobe InDesign or a close equivalent. These applications have intuitive functionality and are ideal for preparing artwork for glow-in-the-dark printing.
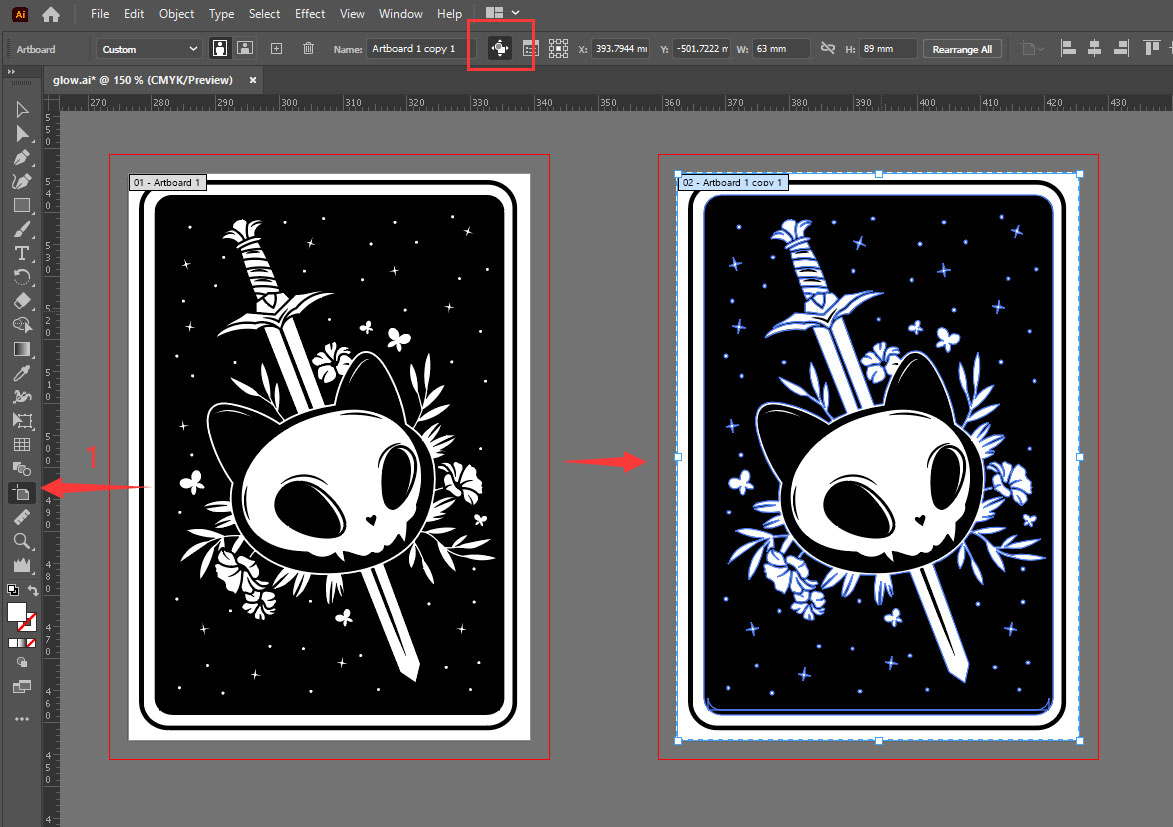
2. Copy your artboard – With the artboard tool, select the artboard with your design and then check the “Move/Copy Artwork” box in the panel. Hold down the “alt” key and use your mouse to duplicate a new artboard in the workspace.
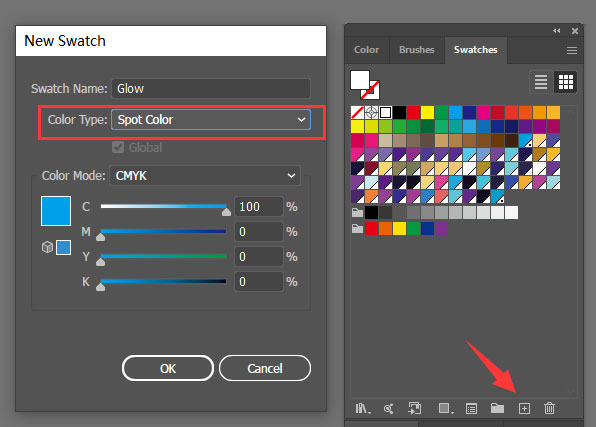
3. Make spot colors – In the colors panel, make a new color swatch. Name it something obvious like, “Glow Color”. Set the color type to “Spot Color.” You can choose any color except white for this.
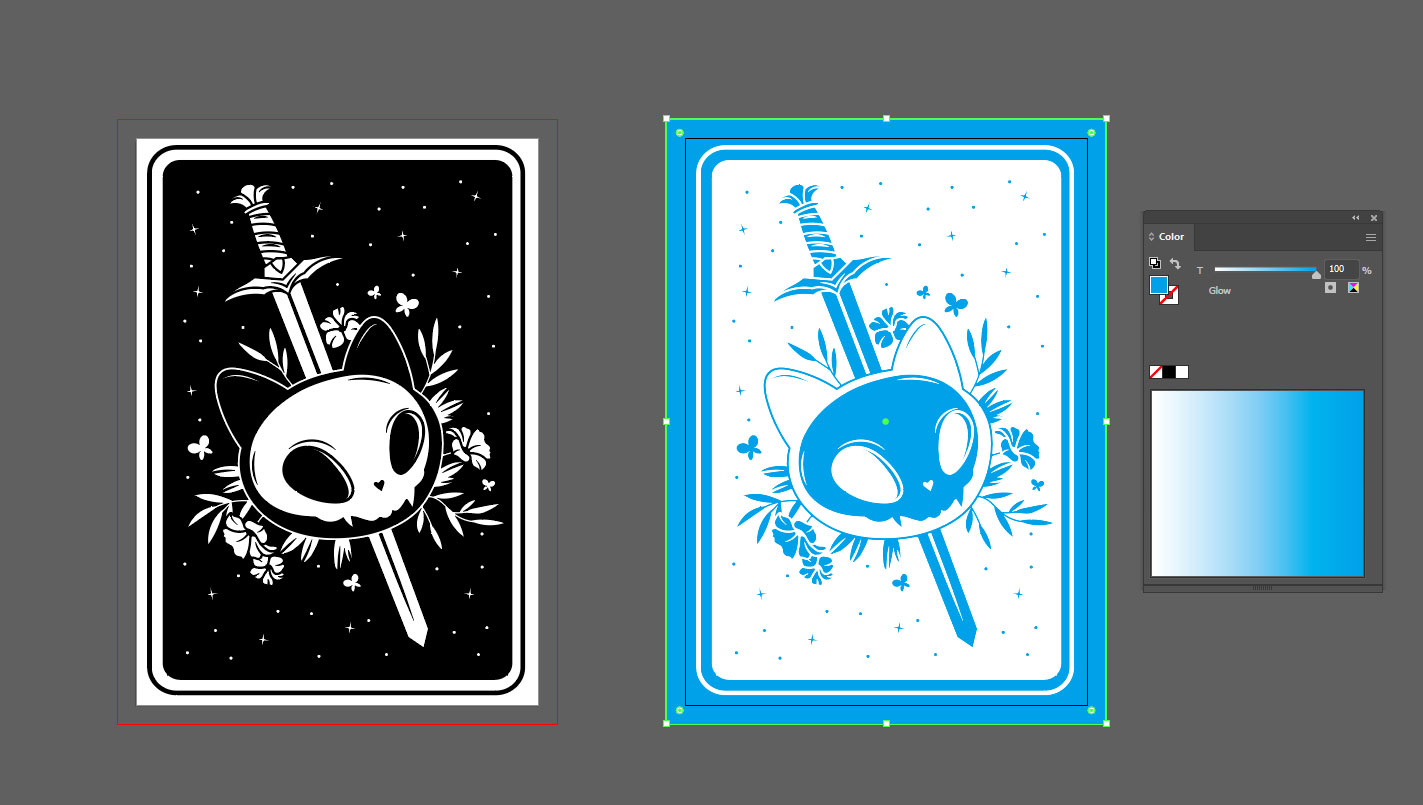
4. Outline the parts where you want the glow – On your copied artboard, use the pen tool to trace the outline of all parts to which you want to apply glow-in-the-dark printing. Do this on a new layer, making sure the original artwork and the glow file align perfectly.
5. Apply the spot color – Fill the outlined parts with the spot color you generated earlier. Then, delete all other content on the new artboard except for the spot color areas.
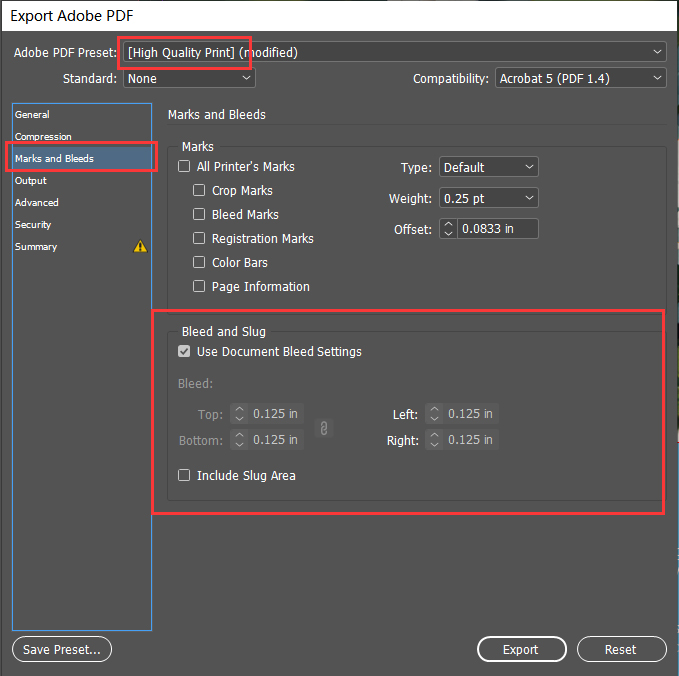
6. Save and check your file – Save your original design and the glow file as a single PDF. Choose “PDF” in the file format options and remember to check the “include bleed” box to avoid any white borders after trimming. Open the PDF in Adobe Acrobat, use “Print Production” and “Output Preview” to check that the spot colors are applied correctly. If everything looks good, you're ready to send the files to us for a final check by our experts before printing your product with glow-in-the-dark inks.
If you use a professional third-party designer or have an in-house expert, you should have no issues with this process. However, if you're doing this yourself for the first time, while these instructions are an excellent guide, you may need further help and advice. If that's the case, remember that we're always here to help you if you choose to print with us. Our experts are friendly, patient, and very helpful. So, don't be shy about getting in touch to ask for support or advice.
Talk to us! We're here to help.
QinPrinting has built a global reputation for excellence in the field of offset printing. Our worldwide reputation is founded on our expert knowledge and experience within the industry, state-of-the-art printing technologies, unbeatable prices, rigorous quality controls, and genuine dedication to personalized customer care. If you have any questions or would like a no-obligation quote, please get in touch.

