Preparing a die cut template for your print project? Read our essential guide to getting your artwork files ready for die cutting with InDesign and Illustrator from Adobe

Die-cutting is a creative process that transforms paper and cardboard into custom shapes, especially for crafting eye-catching designs for book covers, children’s board books, pop-up books, and paper engineered product packaging and promotional materials. With die-cutting print capabilities, possibilities range from simple alterations like a hole or window to more elaborate 3D-folded shapes and designs. Adobe InDesign and Illustrator are the premier software tools for crafting and refining artwork, tailored for the unique requirements of diecut. These powerful programs allow for precise control and versatility with die-cutting templates, making them indispensable in your design toolkit.
Navigating the die-cutting design process requires a blend of imagination and technical skills, specifically in mastering Adobe InDesign and Illustrator for die cut print projects. We’ve structured this post to guide you through essential steps like setting up your document for die cut, including creating a die-cutting templates layer and ensuring compatibility between Adobe InDesign and Illustrator. We’ll also explain advanced topics such as managing layers for intricately designed die-cuts, applying spot colors for die lines, and preparing your files for print. By mastering both the fundamentals and advanced techniques of die-cut processes in Adobe InDesign and Illustrator, you will be able to develop enhanced designs that are as beautiful and innovative as they are functional.
Understanding die-cutting
When preparing your artwork for die cut print using Adobe InDesign and Illustrator, it’s essential to grasp the fundamentals of die-cutting to make sure your design is not only visually appealing but also production-ready. Die-cutting is a versatile process which QinPrinting uses daily to produce intricate custom shapes and designs, from simple labels and stickers to complex custom packaging solutions. Understanding the technical aspects of die cutting templates will enable you to create designs that are both creative and practical.
Key considerations for artwork preparation
- Die-cut line creation: Create a separate layer in your Adobe software for the die cut line. Fill the die lines with spot colors to differentiate your designs. Use different styles of lines to represent die cut and fold lines
- Export format: Make sure you export your completed file in PDF format, which retains vector quality for die cut print and segues perfectly with all our processes, serving as a digital signature of your design’s readiness for production.
Designing with die-cutting in mind
- Custom designs are easy with die-cutting as you can create custom shapes, significantly boosting the visual impact and individuality of your project. However, when working on how to make a die cut, carefully consider the method’s limitations, such as getting the balance right between the intricacy of shapes versus material thickness.
- Material considerations like the paper weight and qualities can impact the die-cut’s outcome. Opting for thinner papers usually results in cleaner cuts, whereas thicker materials might yield edges that are less sharp. Still, the payoff between these factors depends on what you aim to achieve with your design and the kind of product you’ll produce.
- Finishing techniques are an aspect of die-cutting which are often neglected. The process transcends mere shape cutting; it opens doors to embossing, debossing, UV spot printing, and foil stamping. These finishing techniques in combination can significantly enhance your design, leading to serious impact and sophistication.
Grasping the nuances of die-cut print and preparing your files with knowledgeably executed die cutting templates helps make sure that your design meets both aesthetic and practical requirements. So, let’s look at how to set up your document in InDesign.
Setting up your document in Adobe InDesign or Adobe Illustrator
When setting up your artwork for a die-cut in Adobe InDesign or Adobe Illustrator, it’s super-important to begin by accurately configuring your document. This enables a smooth transition from digital design to print. Here we go, then, step-by-step.
Document setup
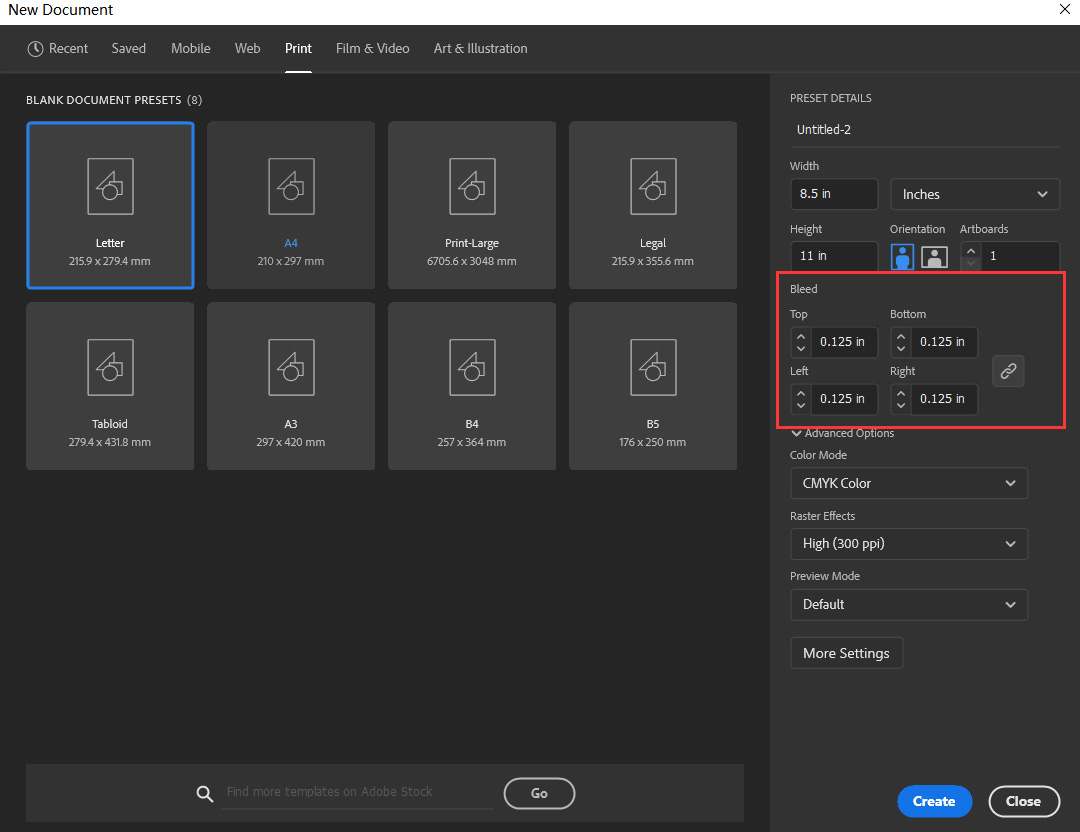
- For optimal bleed settings, apply a bleed of 0.125″ (3 mm) on all sides. This essential step makes sure that any color or image reaching the edge of your design extends past the trim area, eliminating the risk of unsightly white borders when the edges are cut and trimmed off.
- Color mode: CMYK mode.
Creating a die-cut layer
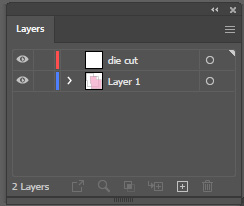
Create two layers. Start the process by accessing the Layers panel (Window > Layers). You will need to create two separate layers; one should be labeled ‘Die’ or ‘Die cut’ for your die lines, and the other ‘Art’ or ‘Artwork’ for your creative work, enabling an organized and streamlined workflow.
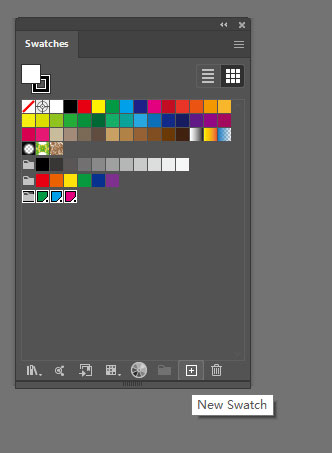
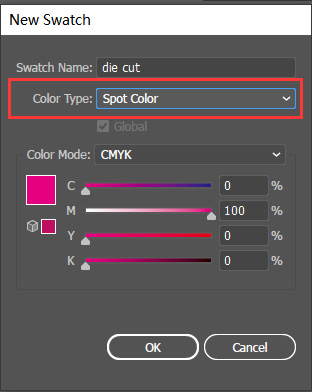
Creating a spot color for die-cut lines
Now, we’ve mentioned creating a spot color for die-cut lines and we’ve highlighted the importance of spot color setup in your design as a critical step for preparing your artwork for printing and die-cutting. For those new to this, here’s a detailed guide on how to configure your spot color accurately. If you’re familiar with the process, feel free to move on.
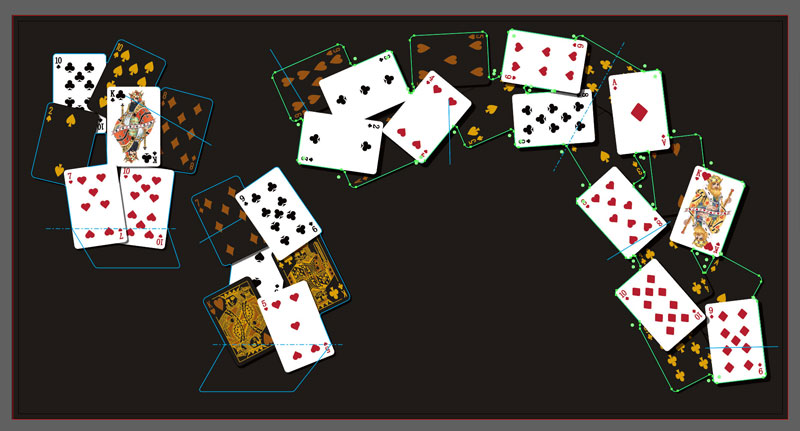
Create the die-cut path
Positioning the die line. On the ‘Die’ layer, inscribe your die line with great care using the Pen tool or Shape tools. Make sure that you center the die line on the edge of the page without touching it, to guarantee that the die-cut aligns precisely with your design, and so eliminating any potential discrepancies.
Change the outline color to spot color.
If your design is vector and use Adobe Illustratoor, you can create a die plate using the following method:
- Get started by using the copy and paste in place feature to duplicate your illustration, securing its exact positioning.
- Use the ‘Unite’ function within the Pathfinder tool to amalgamate all elements into a single, unified shape.
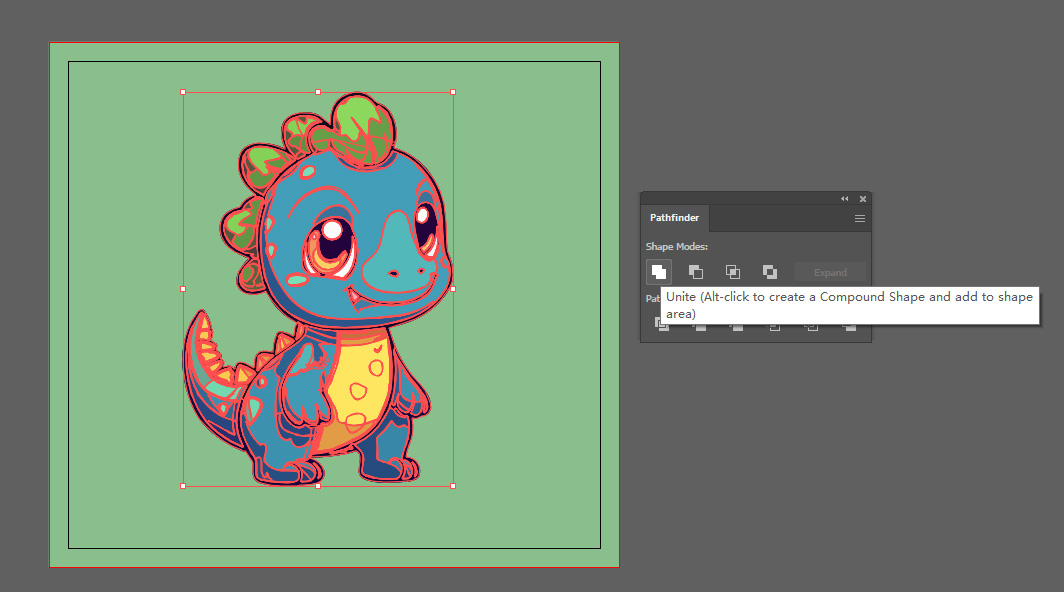

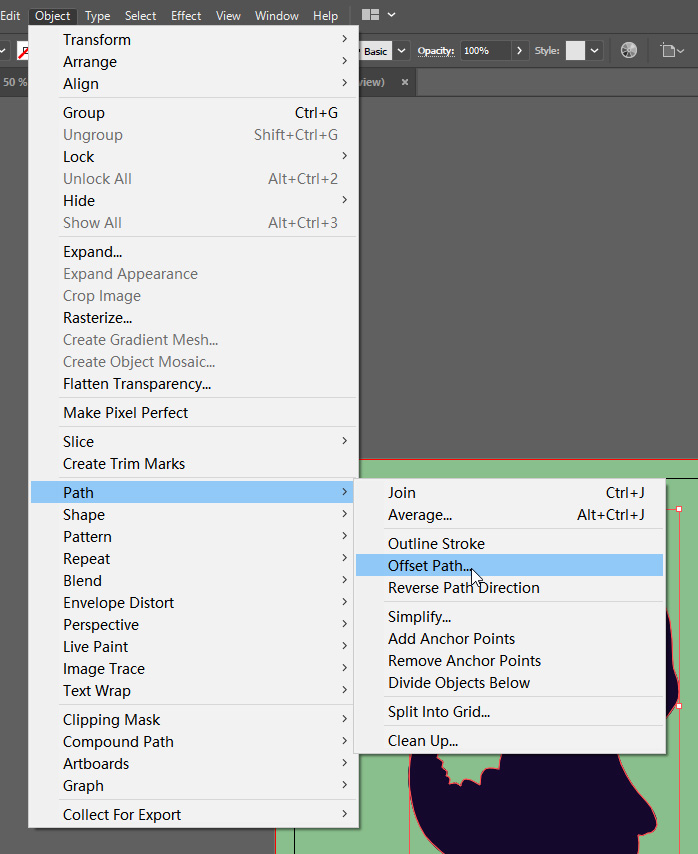
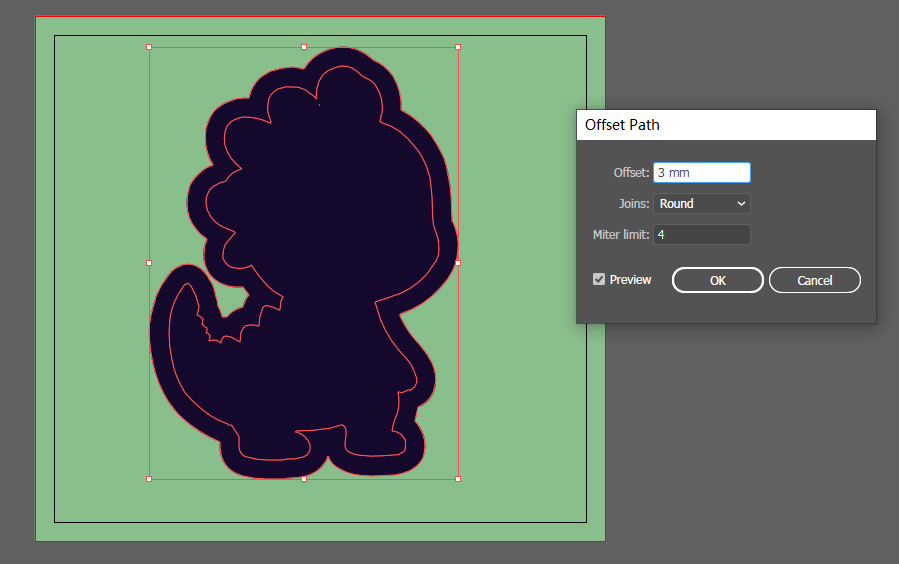
- Go to ‘Object > Path > Offset Path’ in your software and modify the offset dimensions to suit your project’s specifications, thereby creating an adequate buffer zone around your artwork. Set ‘Joins’ to ‘Round’ to avoid sharp corners.
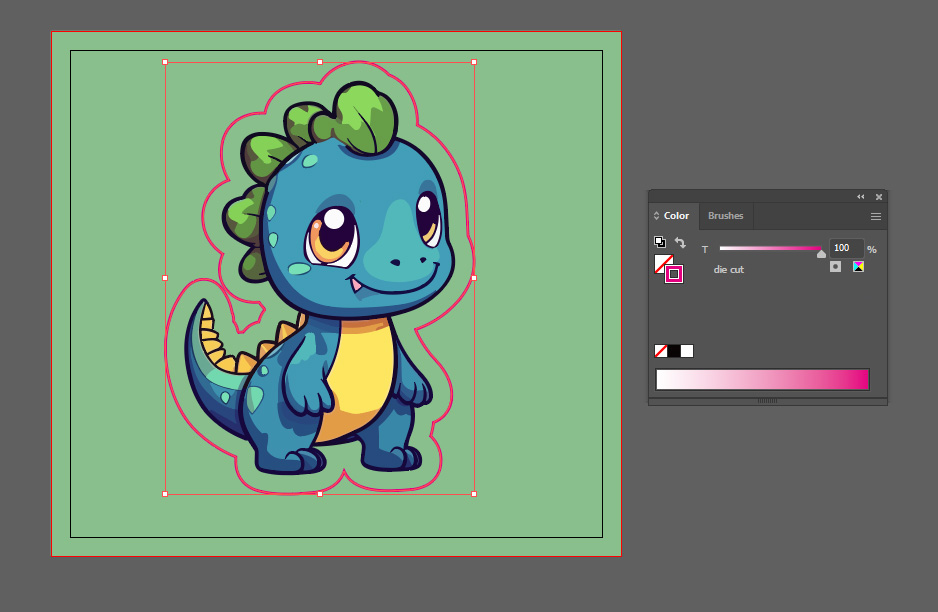
- Fill it with no fill color and change the outline color to spot color.
Fine-tuning your design
- Make sure that the deadline is designated with a spot color for die cut line, which is a common practice in die-cut projects to facilitate precise guidance during the cutting process.
- Configure the same stroke weight for all lines, including perforations, to maintain consistency, so that each line is unbroken and clearly defined.
- For designs incorporating fold lines — such as cartons and pop-up books — make them easy for our pressman to see by using dashed lines and assigning them a unique spot color that isn’t replicated elsewhere in your design.
- Make sure your design has a 3mm bleed setting outside the die-cut lines to avoid ugly white edges in the finished product.
- To smooth out any sharp corners or irregularities, you can make use of the ‘Simplify’ command (Object > Path > Simplify) or manually adjust points using the Pen Tool, thus applying the simplify command for cleaner lines.
- To guarantee superior print quality, all artwork must be prepared in CMYK color mode (unless you’re using Pantone), and it’s essential to maintain a resolution of at least 300 dpi at the actual size of the print.
Embarking on your first die cut design project can be daunting, but remember, it’s never too soon for a design consultation with our experts. Clear communication from the outset, coupled with their guidance, will help to make sure your files are ready for the die-cutting process, allowing us to deliver a flawless printed product for you.
Secure your design
- Lock layers. Once you have correctly positioned your die line and artwork, it’s a wise move to lock layers, specifically the ‘Die’ layer and the ‘Art’ layer. This step safeguards you against any unintended changes that might compromise your design’s precision.
- Review and adjust. It’s recommended that you review your layers, confirming that the die-cut layer is correctly placed above the artwork yet beneath any layers with non-printing objects in the die-cut zone. Sticking to this layer hierarchy makes everything easier and clearer for everyone and saves bothersome hold-ups and reworkings before going to print.
Taking care of all this groundwork not only paves the way for an efficient die-cutting workflow but also enhances the final print’s quality and visual appeal. Should you have inquiries, don’t hesitate to reach out for assistance — we’re here to support you.
Finalizing and saving your file
- PDF requirements. All designs need to be exported as PDF
- Bleed and safe zone. Don’t forget to check that you’ve added a bleed of at least 0.125″ (3 mm) on all sides and that you’ve followed the bleed and safe zone guidelines above to prevent critical design elements from being trimmed off. Take into account a manufacturing variance of 1–2 mm during production.
- Fonts and images. When you package artwork, we advise you to include fonts and images, or you can send them with your artwork files.
- Remove Color Profiles. All color profiles should be removed to standardize color output across different devices.
How to get compatibility between Illustrator and InDesign
Compatibility between Illustrator and InDesign is essential for a seamless die-cutting design workflow, especially for intricate projects that deploy both applications. To maintain your artwork’s integrity when transitioning between Adobe Illustrator and InDesign, follow these actionable steps and keep these considerations in mind.
Place illustrator graphics
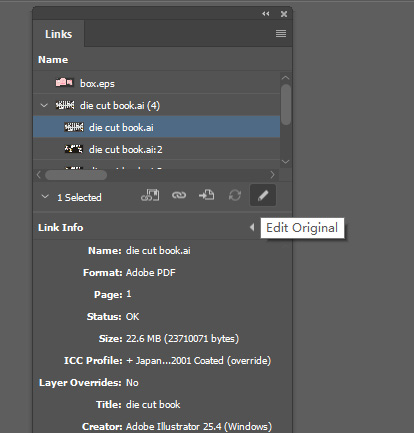
Adobe InDesign enhances your design process by supporting importing .ai graphics directly from Illustrator. This integration ensures a smooth transition and maintains the high quality and scalability of your vector graphics. You can leverage the ‘edit original option’ in InDesign for precise editing of specific graphic layers. This powerful feature opens the artwork in Illustrator, enabling direct and detailed manipulation of each layer. use the ‘Place’ in InDesign when working with multiple artboards in an Illustrator file to pinpoint and import only the essential artboard or page into your InDesign project, giving you a focused and relevant design workflow.
Layer and color management
Verify that the ‘transparency blend space’ settings align across Illustrator and InDesign. Consistency is key — if you’re working with CMYK in Illustrator, make sure to adjust InDesign’s settings to match, thereby preserving the color accuracy and visual integrity of your designs.
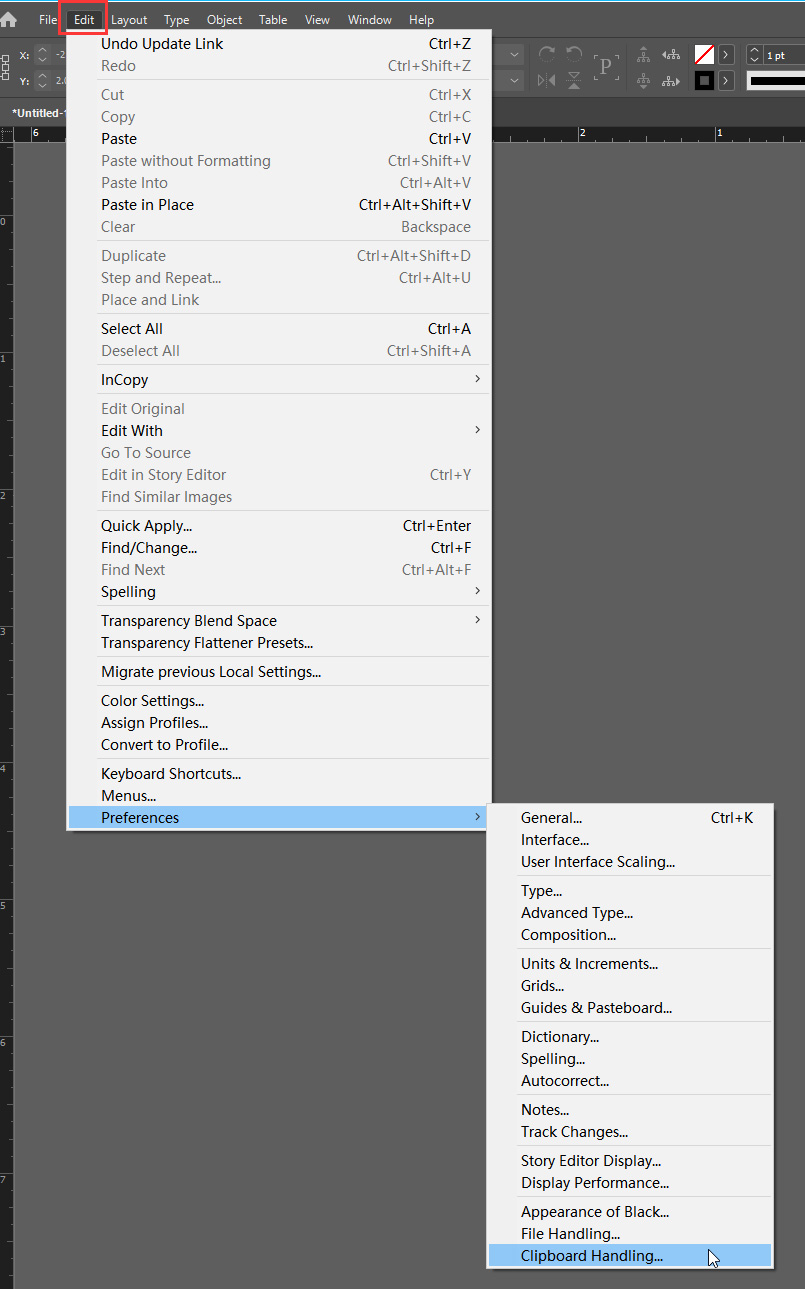
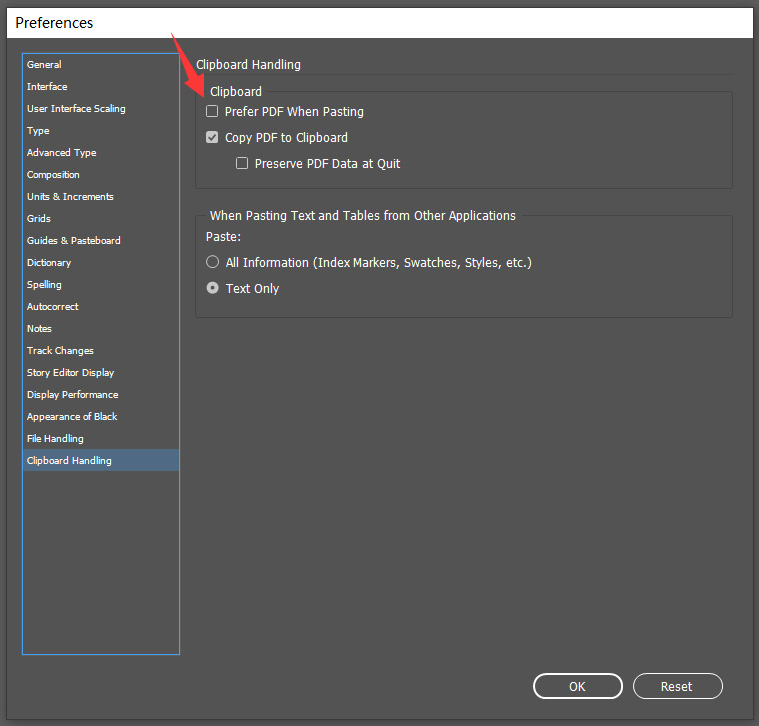
When pasting Illustrator graphics into InDesign, ensure that ‘Prefer PDF When Pasting’ is deselected in InDesign’s ‘clipboard handling preferences’. This approach keeps your artwork’s vector qualities intact and editable within InDesign.
Best practices for die-line and file compatibility
Opting to save your die-line as an AI file format directly from Illustrator rather than an EPS file can significantly enhance compatibility with InDesign. This approach ensures the vector properties of your artwork are preserved, resulting in a superior high-quality print output.
For the best preservation of your artwork’s vector qualities, we recommend using the native AI file when placing your design into InDesign. Unlike EPS formats, the native AI file is more likely to retain all the intricate elements created in Illustrator, which is why we suggest avoiding EPS for optimal results.
While these tips will help you establish a seamless workflow between Illustrator and InDesign, we strongly recommend that you communicate early and often with our design consultation team at QinPrinting, particularly when integrating specialized elements like die cuts. Our expertise is at your disposal to assist in producing files that are not only compatible but also well-prepared, streamlining the printing process to save time and money for everyone, including our clients — and that, we hope, means you!
Layer management for die-cut design
As you approach the final stages of preparing your artwork for die-cutting, impeccable layer management becomes critical. It makes sure your design is streamlined, organized, and primed to meet the exacting demands of die-cutting software. Here’s a guide to managing your layers effectively for a die-cut design:
- When you’re dealing with designs that feature multiple colors or necessitate various layers — namely, all die-cutting! — it’s imperative to establish and stick to a meticulous file structure. This organization is the backbone of a well-orchestrated design file.
- To facilitate a more efficient editing workflow, assign each color or design element to its own layer. This strategic layer organization allows for targeted edits on specific components of your design without disrupting the rest, ensuring a smoother overall editing experience.
- Before finalizing your design, remove unnecessary layers, ensuring that you delete any superfluous images, shapes, or elements that could hinder the die-cutting process.
- Check that your file contains only paths and shapes, as these are the components that die-cutting software can interpret with precision.
- When you submit your final artwork to us, please remember to include the die lie layer! This crucial layer acts as a precise guide for the die-cutting machine, and it’s surprising how often this essential detail is overlooked.
If you are working with us, once your design and export settings are perfected, send us your artwork and die line file so that our experts can undertake a thorough review. If we find any errors, we’ll let you know and help you fix them. We want you to be completely satisfied with your products and so we always go the extra mile to make sure everything is right and ready before we go to press.
Talk to us!
Throughout this guide to preparing artwork, we’ve navigated the vital steps needed to ready artwork files for die-cut using tools like Adobe InDesign and Illustrator. From mastering document setup, managing die-cut layers, to ensuring software compatibility and file preparation for printing, these instructions provide a robust framework for you to realize your creative concepts as tangible art. Your careful attention to each detail means your design should meet both your aesthetic needs and our technical requirements for the die-cutting process. As soon as you’re ready, for a quote, or to ask a question about any of this, please don’t hesitate to get in touch. We’re here, we’re global experts in the industry, and we care. Let’s work together!