Our easy to follow guide on preparing your digital artwork files for printing on holographic paper

Holographic paper printing offers a unique and eye-catching way to create stunning artwork, from book covers and posters to game cards, comics, and custom packaging. Whether you’re an author, artist, or designer looking to add a captivating touch to your projects, learning how to prepare your artwork files for holographic printing is essential.
In this post, you’ll discover the key considerations for designing holographic prints, including understanding the properties of holographic paper, choosing the right software and file formats, and following a step-by-step process to make sure your artwork is print-ready.
What is holographic paper?
Holographic paper is a unique material that creates eye-catching, iridescent effects through a specialized manufacturing process. The process involves three main steps:
- The surface of the paper is altered to create an uneven texture, preparing it for the next step.
- A thin layer of aluminum is vaporized onto the texturized paper, giving it a reflective, metallic sheen.
- A protective layer is applied to seal the metallization, completing the holographic effect.
When light hits the surface of holographic paper, it diffracts due to the texture and metallic layer, creating a captivating, color-shifting appearance.
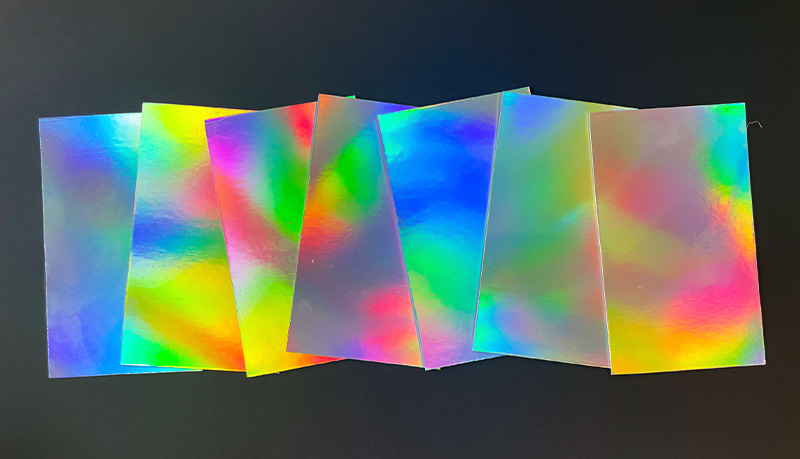
Holographic paper is versatile and can be used in various applications, such as packaging, labels, book covers, cards, and gift wraps. It is particularly effective in attracting attention and adding a sense of exclusivity and quality to products. Combined with color printing, it is an excellent choice for outstanding book, comic, and graphic novel covers and for making standout game cards.
What is holographic printing?
Holographic printing is a specialized printing technique carried out on holographic paper, which exhibits a unique iridescent effect when unprinted. When over-printing with ink the holographic effect gets covered, but by calibrating the intensity of the ink applied to the holographic surface, we can create a range of effects from a pure holographic sheen to more subtle degrees showing through the ink.
Top Tip: When you’re designing documents for holographic printing, there’s no need to design rainbow-colored or similar effects for the holographic parts, as the paper is already holographic. Instead, design everything in regular colors, avoiding intentionally drawing holographic effects.
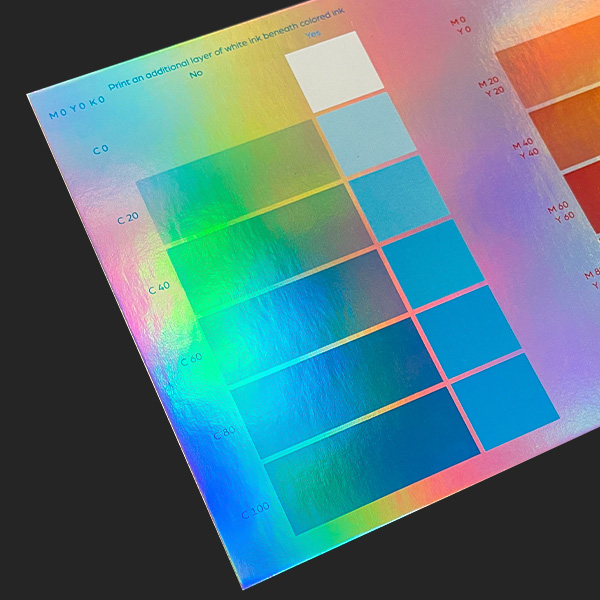
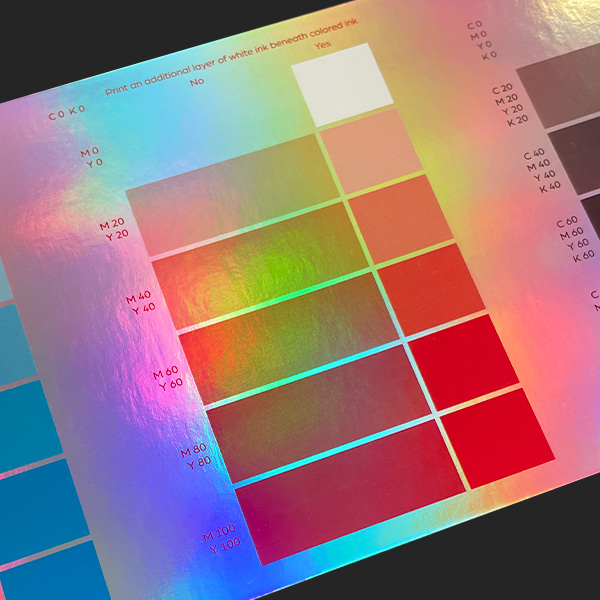
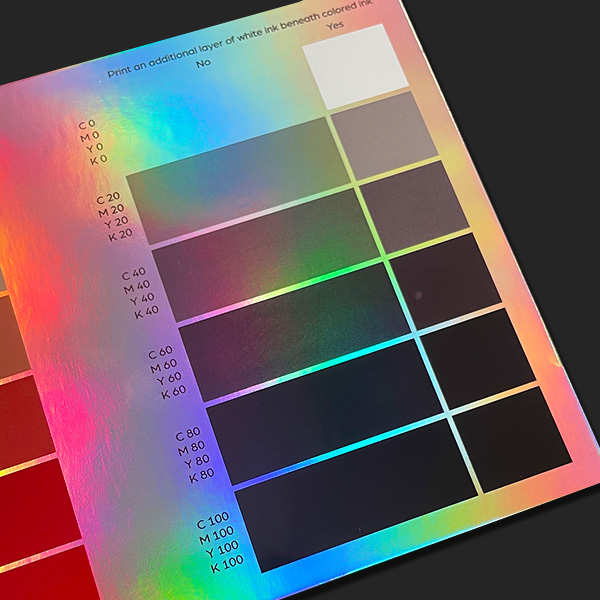
Here shows how printing different ink densities on a sheet of holographic paper changes the effects you can achieve:
The left half shows the range of effects achievable with direct overprinting. We didn’t print any ink in the top left corner, so the holographic effect was really noticeable. Then, as we moved down, we printed increasingly higher densities of ink until right at the bottom the holographic effect was almost completely lost.
The right half shows what happens when we print a layer of white first and then add varying ink densities on top. This process eliminates the holographic effect from the whitened areas completely.
So, with one or the other or both of these processes, you can get an excellent array of possible holographic effects depending on how we apply the ink to the holographic paper and in what density.
How to design artwork for holographic paper effects
The most important thing to remember when you’re designing your artwork for holographic paper is not to create a “holographic effect” in your print file. Design it as usual for regular printing artwork. There is no need to design the holographic effect especially as it’s already on the paper. So the areas you want to have the strongest holographic effects should just be left white. Let’s look at an example to make this clearer.
Recently we had the pleasure of working with Chad Townsend, an artist and animation designer whose collaborations include Scooby-Doo, Batman, and the Lego movies. He frequently works with Warner Bros., Disney TV, and Marvel Films. Chad came to us to print his indie comic book project, The Black Phantom.
This is his design document for the comic book cover.
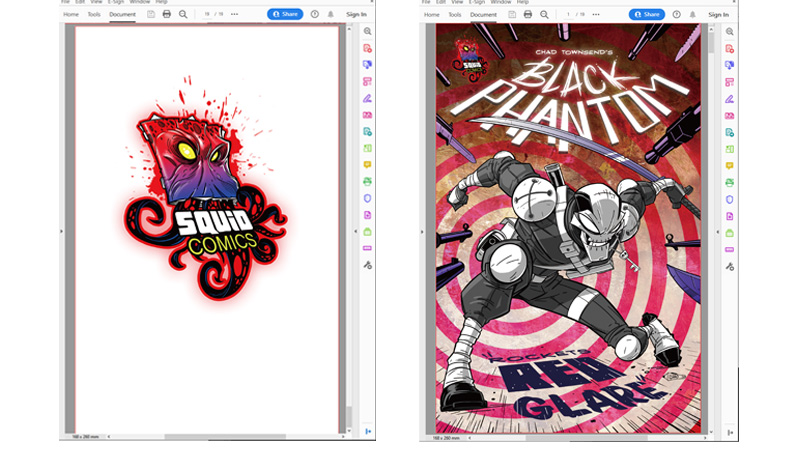
So, take note that Chad hasn’t added any holographic color on the document. But after printing, you can see the holographic effect. Also, note that the holographic effect is particularly obvious in the white title part of the design and the white parts of the characters.
Chad was delighted with the results, as were his many fans, when he showed off his finished comic book cover on his Instagram account. Check it out here: The Black Phantom Cover.
Chad chose to make his book cover entirely holographic. But what if you only want certain areas to have the holographic effect and others not? In that case, you’ll need to make a mask file. So, let’s look at how to do that next.
How to prepare a mask file for partial holographic printing
To overprint some areas without holographic effects and leaving others with holographic effects, you must prepare two files. These will be your color printing file and your “mask file”.
The first is a regular four-color (CMYK) printing file for designing colors and patterns; the other is a white ink printing file, including all parts that do not require the holographic effect.
The mask file instructs us to print a layer of white to cover the original sheen of the holographic paper in the areas you don’t want it to show, and then we’ll print your designed colors and patterns over the white ink to achieve a non-holographic effect.
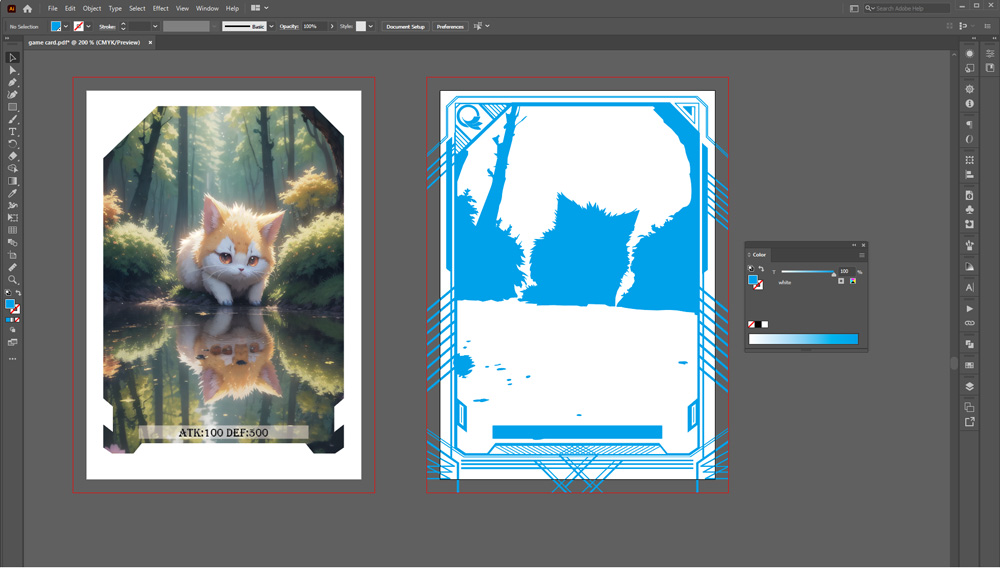
For example, let’s say you’re designing collectible gaming cards with partial holographic effects. You’ll need to design two files for each card. Imagine you’ve designed a character card of a cat sitting by a pool of water. You’d like the cat’s reflection in the pool of water and the surroundings to have a holographic effect, but not the cat itself.
So, you create an artwork file with the complete image. Then you create a mask file which shows us that we should overprint the cat with white before printing the colors over it.
To do that, you’d use the pen tool to outline the cat’s silhouette and fill it entirely with a blue spot color. Actually, you can use any color — apart from white, which would be invisible — but the standard convention is to use blue or black. This spot color “masks” the cat so we know where to print the white layer prior to printing again with your full-color artwork of the cat.
Likewise, if you want to add a white border around a card, you can’t directly represent the white border in the four-color printing file — because white is invisible — so you’d use the pen tool to outline the border and make it into a separate blue vector file.
So, now you know how to prepare for full holographic printing and how to select only certain sections for holographic effects.
Preparing artwork for holographic paper printing in Adobe Illustrator
This is the complete process of designing a holographic card using Adobe Illustrator, explained and described step by step:
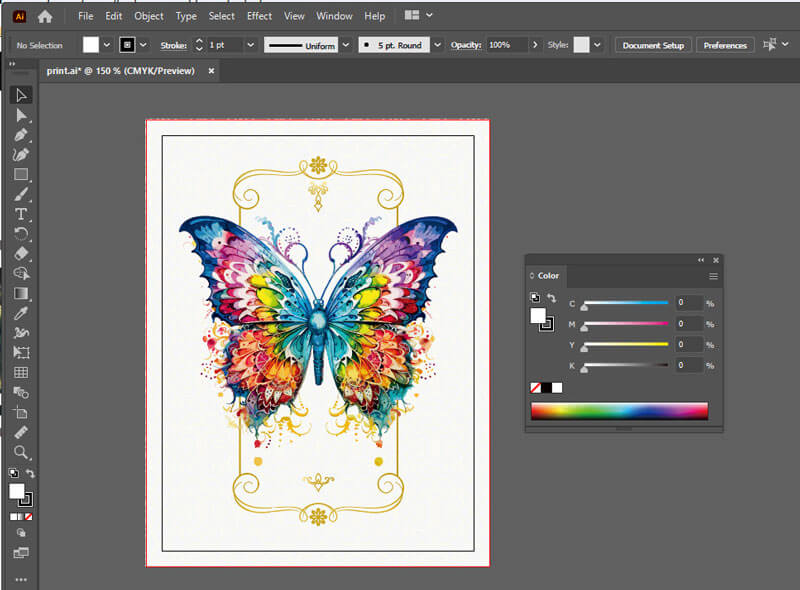
1. Open your design in vector file creation software such as Adobe Illustrator, make sure you artwork has 3 mm/0.125 inch bleed and the color space is in CMYK mode.
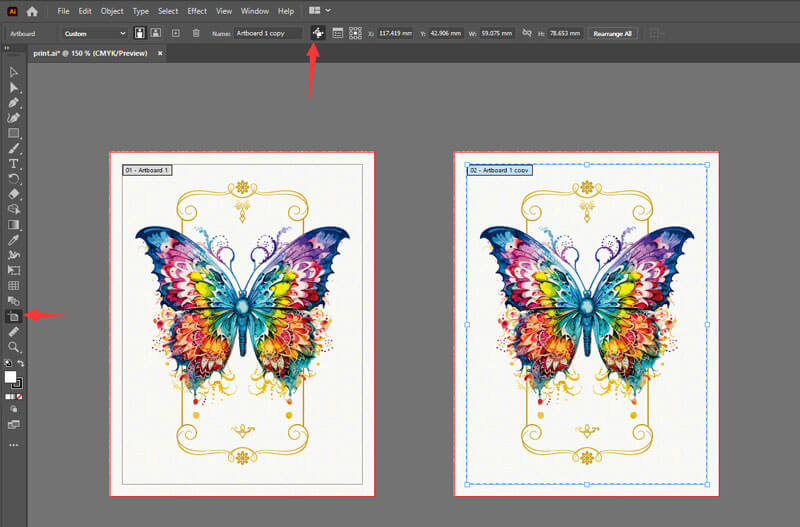
2. Use the Artboard Tool to select the current artboard, check Move/Copy Artwork with Artboard, hold down Alt, and drag to copy a new artboard.
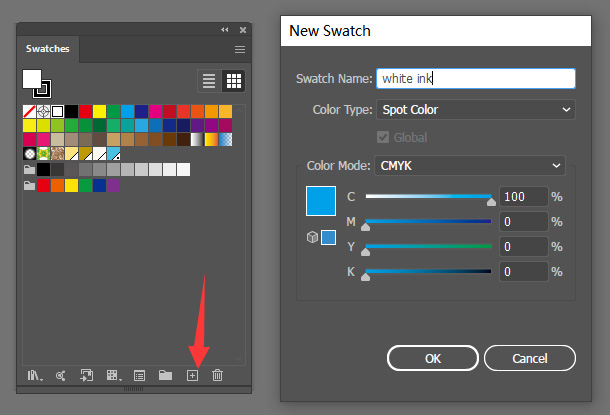
3. In the Color panel, create a new swatch and name it "white ink". Set the Color Type to Spot Color. Choose any color value, but not white.
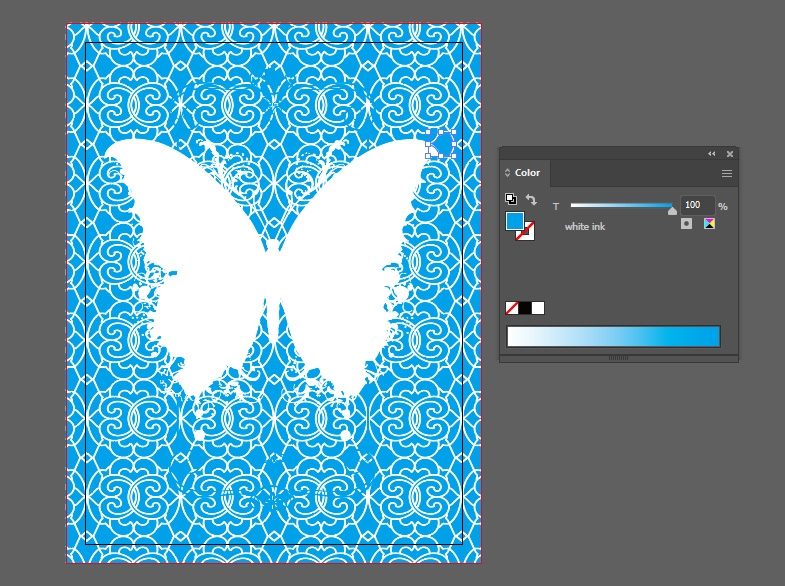
4. On the newly copied artboard, fill all the parts that do not want to have a holographic effect with this spot color. If the design is an image, use the Pen Tool to trace the outline of the relevant parts. It is recommended to do this on a new layer. Make sure the artwork file and mask align exactly. Delete any unnecessary parts.
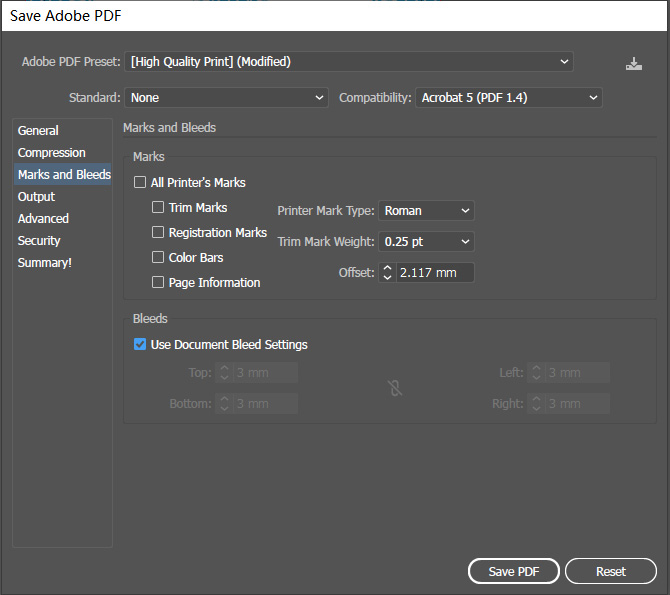
5. Save as PDF, making sure to include the bleed when saving.
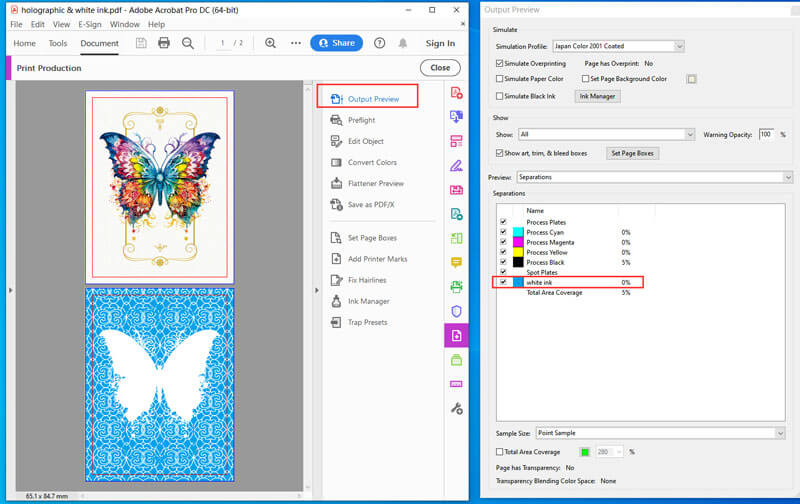
6. Open the PDF with Adobe Acrobat. You can use the Output Preview function under Print Production to check whether the spot color is correctly applied to the design.
If you’re working with a professional designer to create your files, they should understand what’s needed to make everything “print ready” for holographic paper. But if you’re working with Adobe Illustrator or similar design software yourself for the first time, these are the vital tips to remember before you submit your files for printing. Still, if you print with us, our team of experts will always manually check all your files before we go to press. If we find any issues, we’ll let you know and help you resolve them. We’re always here to support you.