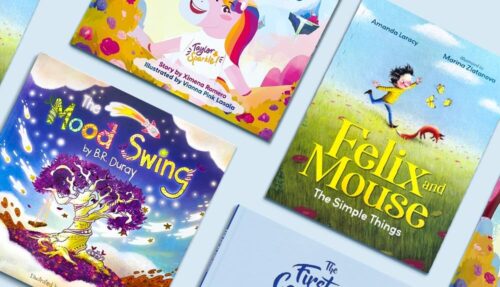
We walk you step-by-step through everything you need to know to write a perfect, legal, and professional-looking copyright page for your self-published book
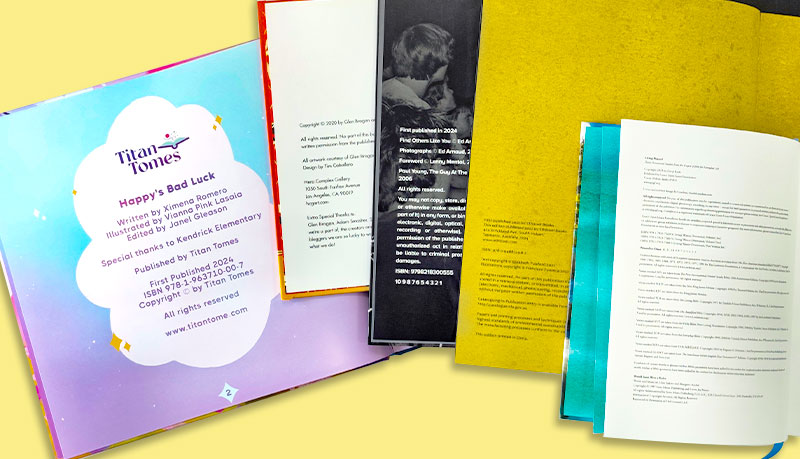
Image: Book Printed by QinPrinting
So, you’ve labored over writing your book—whether it’s a novel, a memoir, a children’s picture book, a coffee-table book or anything else—and you’ve almost completed the layout and design for both the interior pages and the cover. But there’s one task left to tackle: the copyright page. Every professionally published book you’ve ever read has got one. But they’re all a bit different. So how do you, a self-published author, know what yours should contain, how it should be laid out, and if you’ve got it right? Based on our almost 30 years’ experience in the industry, that’s what we’ll explain to you here in this helpful post.
If you’re wondering how to create a copyright page for your book, the first thing to understand—and this may surprise you—is that there is no legal requirement to print a copyright page in your publications. And, despite the common assumption and misinformation doing the rounds online, there’s no need to ‘register’ your copyright with any government department or other institution. If anyone ever asks you to stump up your hard-earned dollars to “register your copyright” be very wary indeed as, even if it’s not a scam, it’s probably totally unnecessary. International copyright law states that any original creative work is automatically granted copyright as soon as it’s created, even before you publish it. You can get all the details about the latest laws regarding copyright in the US and international copyright treaties on the US government website, here: US Copyright Office.
But with that said, there remain several good reasons why we recommend you to publish a copyright page in your book even though it’s not strictly necessary. These are the reasons why all mainstream published books have copyright pages. And we think you’ll see that for the little extra effort it will cost you to write a copyright page for your self-published book, it is well worth your while.
- All mainstream publishers do it and so it makes your self-published book look more authoritative and professional
- Few people understand copyright law, so publishing your copyright statement makes it clear to everyone that your work is legally protected and must not be copied, sold, or distributed without your permission
- A copyright page also serves as a space in which to publish any disclaimers, such as the common statement that the people and events in the story are entirely fictional, which can help avoid future accusations of libel or slander
- If you have purchased a unique ISBN—and you’ll need to do that if you want to get your print editions into bookseller catalogs, bricks-and-mortar bookstores, and libraries—this is the place to publish it and any declaration that you have fulfilled your legal duty to lodge a copy with the library responsible for the national archive
So, while it’s not an obligation, it’s a good idea to include a copyright page at the front of any book you publish. We’ll explain the details of how to get a legally assigned ISBN in a following section below.
Having got all that cleared up, let’s have a look at how to actually do it; let’s show you how to create a copyright page for your book. Again, there’re no strict regulations about how it should be done; but over the centuries, a number of accepted norms and standards have developed in terms of what the copyright page contains and the way in which it’s formatted. Unless you have a really good reason to do otherwise—and, to be honest, we can’t think of any!—our personal industry experience suggests that it’s best to follow the conventions. Let’s start with the format.
Copyright page format
When you’re figuring out how to write a copyright page for a book, where do you start? First, you must know where your page fits. What comes before and after the copyright page? Your copyright page traditionally finds its home resting between the title page and your dedication page, if you have one. Otherwise, between your title page and the first chapter, introduction, prologue, or preface of your book, if it’s fiction. For non-fiction, it goes after your title page and before your table of contents, foreword or preface, and the body of your book.
What should a copyright page include?
When thinking about how to create a copyright page for your book, you should know that here are two different types of copyright pages: the essential and extended versions. If you’re self-publishing, you may only need the essential version. It includes both your copyright notices and your legal notices. For the extended version, you may choose to add more information. These are all the elements you may wish to include on your page:
- Your copyright statement
- The year of your book’s publication
- The author’s name
- The edition of your book
- Your book’s publication information
- Your book’s printing history
- Your book’s cataloging data
- Any legal notices
- Any credits to your book
- Your book’s ISBN
- Your book’s website address
- Your disclaimer (if applicable)
So, with that in mind, we can take a look at what you can include as a bare minimum in the essential version of a copyright page. Anything else is optional. But you may choose to add an extended version in particular circumstances.
Copyright page example—the essential version
This is an example of an essential version. You’re welcome to add additional legal notices. The following example uses only the bare essentials.
“Copyright © 2020 A. N. Other. All rights reserved. No part of this book may be used or reproduced without the written consent of the copyright owner.”
That’s it! Pretty simple, right? The next example uses the extended format. You may exclude any portion or portions so long as you keep the copyright and legal notices.
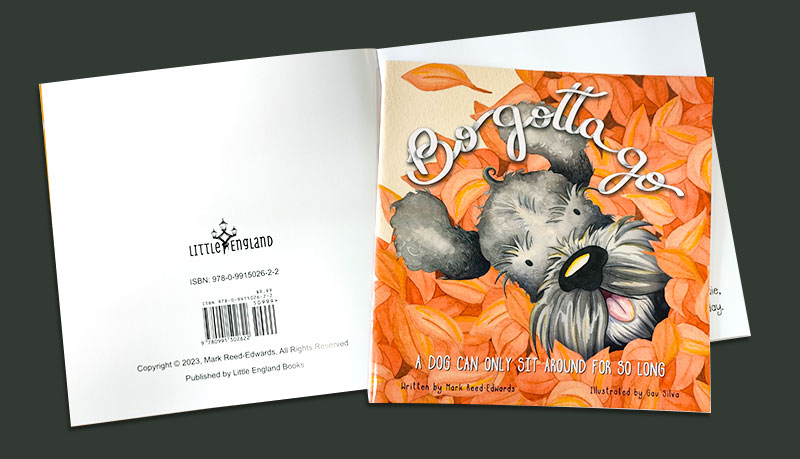
Image: Book Printed by QinPrinting
Copyright page example—the extended version
“This book you’re reading is a work of fiction. Characters, places, events, and names are the product of this author’s imagination. Any resemblance to other events, other locations, or other persons, living or dead, is coincidental.
Copyright © 2020 A. N. Other
The author reserves all rights to be recognized as the owner of this work. You may not sell or reproduce any part of this book without written consent from the copyright owner.
First paperback edition April 2022
Book design by Groovy Graphics
Printed by QinPrinting, Shanghai
ISBN 987–6–5432–1098–7 (paperback edition)
Published by Blah-blah Publishing
www.blahblah.net
Take note that while this is the most common way to lay out the information, for a self-published book, the order of the elements isn’t critical. If you have all the elements on the page, your work is complete. The same would not be true if you followed an APA style guide or MLA style guide. Small presses and traditional publishing houses may have their specific in-house rules about how to layout the copyright page.
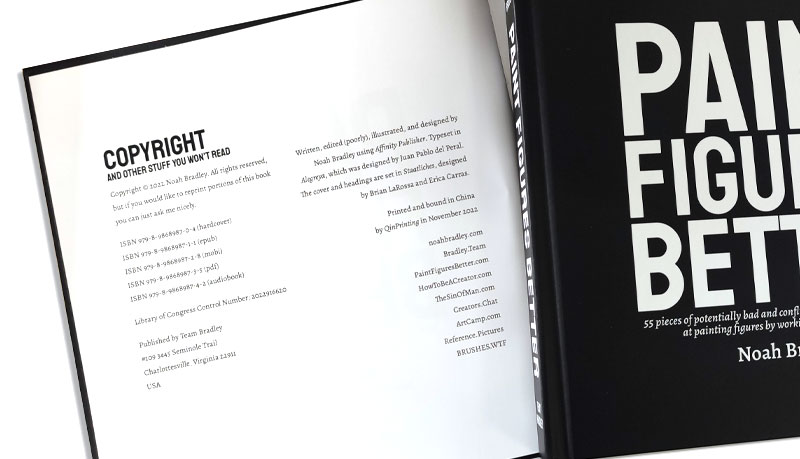
Image: Book Printed by QinPrinting
How to create a copyright page for your book—the details
You may not need a book design template for your copyright section because many of these elements are self-explanatory. A few aren’t. Be sure to read each to make sure you’re headed down the right track before you construct your page.
Copyright notice
Your copyright notice declares that you are the sole owner of the copyrighted material therein, unless you’re not—for example, in the case of an illustrator who retains the copyright to their contribution, in which case you’ll need two notices, one for you as the author and another for them as the illustrator. This is the essential element to get to grips with when working out how to create a copyright page for your book. It consists of four elements:
- Copyright: make sure both the word and symbol are included. © is the international symbol for copyright. It’s available in the “symbols” or “special characters” section of most word processing apps and software.
- Copyright owner: the name of the person who legally owns the copyright. Probably you if you wrote the book!
- Publication year: this is the year you publish your book, not the year you wrote it.
As long as these pieces sit side-by-side, alone, and on the same line, your work is complete.
The "All rights reserved," legal notice
This is the most common type of legal notice used in written work. As long as you include the words “all rights reserved,” you’ve covered your bases.
That deceptively short phrase shows beyond doubt that you, the author and copyright owner, reserve all the formal and legal rights granted by copyright protection. That prevents others from publishing, distributing, or creating derivatives of your work without your explicit written permission. Some books also include a line about their moral rights. It might read something like, “the moral rights of the author to be identified as the originator of the work are also asserted.” Many countries outside the US consider economic and moral rights to be disparate parts, so this may be more important if you’re publishing in the UK, Europe, or any other part of the world.
Disclaimer statement
Your disclaimer is included for one purpose. It’s there so that you don’t get sued. There’s a long history of wealthy authors who’ve been sued by wannabees who say the authors stole their work. That list includes J. K. Rowling, Stephenie Meyer, and Cassandra Clare, to name but a few. Still, be careful when using ideas, characters, or places from another artist’s work. These fall under the Fair Use laws, which are often misinterpreted. For instance, using copyrighted images is illegal. But you might try to circumvent the law by including a sketch you drew that you modeled after a copyrighted image. That would potentially fall under the Fair Use laws. Likewise, you could mention, say, Batman, in your novel, but you couldn’t have a character called Batman or any character who looked like, spoke like, and did the sort of things Batman does. But we don’t recommend trying to circumvent laws! Remember, they exist for your protection as much as anyone else’s.
Credits
Did anyone else offer up their own art for your book? Who illustrated your cover? Did you include other images among your book’s many pages? Who printed it?
If you’ve collaborated with others—individuals or organizations—to create and produce your book, it’s generally considered “good form” include them in your credits. If the artist uses a different copyright, follow the same basic format that you used for your own copyright notice as we explained above. If they don’t—perhaps because you commissioned the art and bought the copyright with it—you only need to include the artist and the art on your book copyright page as a courtesy. Likewise with most book designers and printers. But it’s good to be courteous, and if you’re happy with a service you’ve received, then letting others know about it is a good way to promote those services to everyone’s benefit and no cost to you. Here are examples of the most common types of credits:
- Illustrations copyright © 2020 by Art Paintermann
- Cover art and layout by Dodgy Designs Inc.
- Printed by QinPrinting, Shanghai
You’re welcome to get wordy if you include these elements, if that’s your style or you’ve some particular comment to make. You’re safe as long as you include the artist, the art, and copyright (if it doesn’t belong to you). That said, short and sweet is often the best idea. Who reads copyright pages, anyway? Probably not your fans who just want to get straight to the start of chapter one and the beginning of your riveting story, right? Get the basics down to cover your back and let the reader move on to your exciting novel, supportive self-help book, mouth-watering recipe collection, or whatever it is.
ISBN
The International Standard Book Number, or ISBN, is like a fingerprint for your book. You must acquire one if you plan to sell copies through the mainstream distributors, get it placed in libraries, or in high street bookstores. Note that the same book has a different ISBN for each book format, e.g., eBooks, paperbacks, and hardcovers. In the US, you can get an ISBN assigned to identify your unique book through the official provider, Bowkers. In the UK, it’s Nielsen. Other countries have their equivalent organizations. It’s a very simple process. You enter a few details about your book, your author name, and pay a small fee, and the organization assigns you a unique ISBN for that edition, registers it, and sends it to you. The same services can also generate a barcode to go on the back cover of your book, as can most professional book designers.
Book edition
Books that last usually go through different editions. You may sell out your first print run—we hope you do!—and then the second print run, even if identical to the first, is your second edition. Or, you may choose to change the cover design, add new material, or change the formatting of the book, and so you’ll need to print that as a new edition, with its own ISBN and barcode assigned to it. It’s a hold out from the time when books were expensive to print and produced in small batches. Changes occur between each edition. Since this is the first time your book is coming out, you may include “First Edition.” You can also skip it altogether. Look at a book design template if you need help.
Publisher details
If you’re self-publishing, this is a chance to promote yourself and your “author brand” as a business! Your details should include the following:
- Your publishing company’s name
- Your publishing company address
- Your publishing company’s website
You may print them on the same line or have each on a separate line. If you choose the latter, use single line spacing. If you don’t have any of this information, just leave it out. It’s not necessary to print, publish, and sell your book. But if you have it, as they say, flaunt it!
What's Next?
Now that you know how easy it is to create your own copyright page, it’s time to get started. The first step is to sign up for an ISBN number. The rest is simple. Just fill in the blanks. And that, in a nutshell, is all you need to know about how to create a copyright page for your book. That should be a comprehensive answer to the question, but if you think there’s something we’ve missed or you have questions, just get in touch.
After you finish your manuscript, don’t forget to shop around before you self-publish. Prices, quality, levels of service, and aftercare can differ widely, so talk to us first. We have over 25 years of success in the industry and a worldwide reputation for excellence based on high-quality products, unparalleled customer service, state-of-the-art technology, and unbeatable prices. We’ll be happy to hear from you by telephone, email, Skype, or our handy online contact form. Here’s our contact page. Let’s talk. We can’t wait to play our part in your publishing success!

