If you need to learn how to design a print-ready book cover with a pre-made template in Affinity Designer, this is the guide for you. We take you through every step of the process with written instructions, illustrations and screen shots and a video.
You won’t go far in your research into how to become a successful self-published author before you realize that—while digital publishing has opened up new opportunities it’s wise not to ignore—you’ll still need to produce beautiful print editions of your books to grab your market share. It’s also true that several popular genres such as art and photography books, coffee-table books, comics and graphic novels are still produced exclusively in print. Whether you’re a romance, SF, fantasy, crime, mystery, memoir, or children’s author, a graphic or fashion designer, an artist or photographer, or a publishing professional, creating a book cover that steals potential buyers attention and meets important printing standards is essential to your success.
Using a pre-made book cover template simplifies this process significantly, especially when you’re working on complex print products such as graphic novels, coffee-table books, or children’s fully illustrated picture books. Our templates are tailored to specific book sizes and binding styles, and you can customize every aspect, making it easier for you to design a cover that turns out perfectly. So in this post what we will do is guide you through the process of using a template from QinPrinting with Affinity Designer—from downloading the template and customizing it, to completing your design, exporting a print-ready PDF, checking it for errors, and submitting it for printing.
Why use a QinPrinting book cover template?
A quick Google search throws up loads of sites offering downloadable book cover templates, so why choose QinPrinting templates? Well, a lot of those sites—although by no means all—are scam sites whose only intention is to sneak malware and viruses into your computer; others are safe but the templates are too basic and can’t be customized, limiting your creative options; others again are good enough and customizable, but there are no instructions. QinPrinting is a globally recognized, well-established offset printing company with excellent reviews and a world-wide reputation for honesty and high-level customer care. And when you use one of our templates, you know you’re getting a template that’s been designed and built by printing professionals. Finally, we’re here to help you whenever you need. You can just pick up the phone or shoot us an email. We’re not suggesting that we’re the only reliable source of book cover templates. But we are suggesting that we’re probably the best.
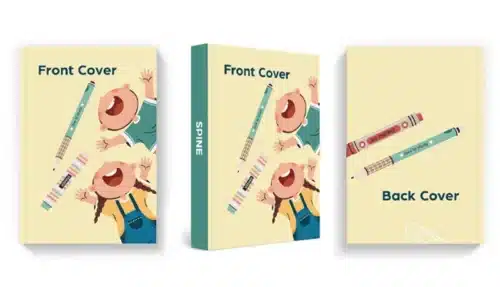
When creating a book cover, especially for print, precision and meeting standards are both very important. A book cover template is a pre-designed file that includes all the necessary guidelines to help you position your design elements correctly. Our templates include vital information like bleed lines, trim lines, safe zones, and spine width, which are essential for producing a professional-looking final product.
Steps to create a print-ready book cover PDF in Affinity Designer
So, you should feel confident by now that using one of our templates (they’re free to all, after all, so you have nothing to lose by trying!) and following our instructions, will help you arrive at a perfect book cover design that looks great and is ready for print. With that in mind, here are the steps you need to take. We recommend, however, that you watch the instructional video at the top of this page first. It’ll really help you visualize the steps below and deepen your understanding and recall of what you need to do.
Step 1: Download the template
Start by visiting the QinPrinting templates page. Here, you’ll find a range of templates tailored to different book sizes and binding types. Choose the binding style that matches your project—be it a softcover, hardcover, saddle-stitch, or another style.
Next, specify the size of your book, including the trim size, page count, and paper type. The template will automatically adjust to accommodate the spine width based on these specifications, saving you a lot of troublesome calculations. Once you’ve made your selections, click the “Download cover template” button, and save the PDF file to your computer.
Step 2: Open the template in Affinity Designer
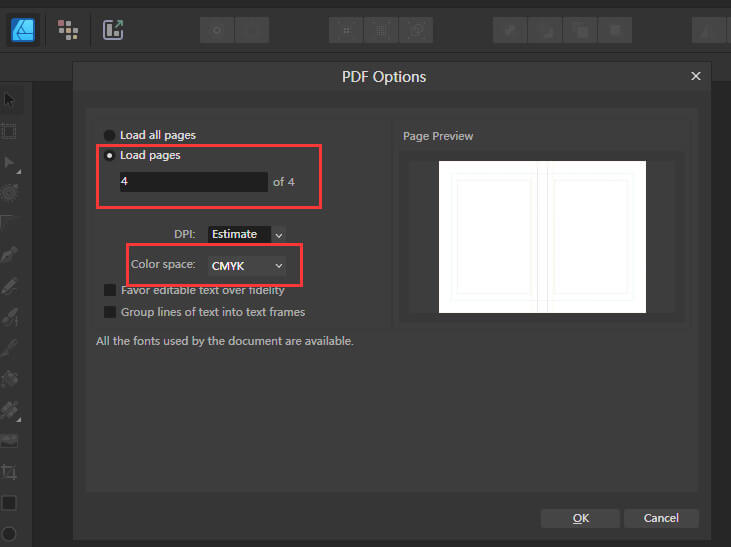
Launch Affinity Designer and open the downloaded template by selecting ‘File’ > ‘Open’. In the PDF options panel, make sure that you load all the pages, especially the cover page (last page). This step is so important because it brings in the template with all the guidelines intact.
Once you’ve opened the file, you’ll see a layout with red bleed lines, blue trim lines, green safe zones, and areas marked for the spine and creases. These lines serve as a roadmap for your design, showing you where to place your images, text, and other design elements.
Step 3: Set up the document
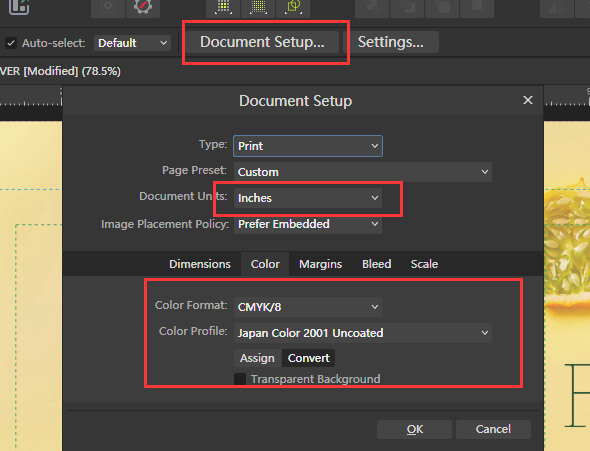
Before you start designing, it’s important for you to configure the document settings to match our print requirements. Go to ‘Document Setup’ at the top of the screen. In the ‘Document Units’ section, choose either inches or millimeters based on your preference. Set the DPI (dots per inch) to 300, which is the standard resolution for print. If it’s less than that, your images may turn out fuzzy or “pixilated” on the page. In the ‘Color’ panel, select CMYK as the color format and choose the ‘Japan Color 2001 Uncoated’ profile for accurate color reproduction.
Step 4: Lock the template layers
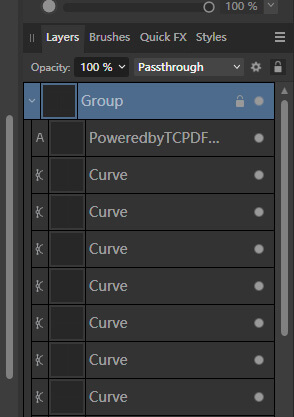
In the Layers panel, select all layers that belong to the template, then group them by selecting ‘Group’. Once grouped, lock this layer group to prevent accidental changes while you work on your design. This step is important because it allows you to focus on your creative work without worrying about altering the template by accident.
Step 5: Design your book cover
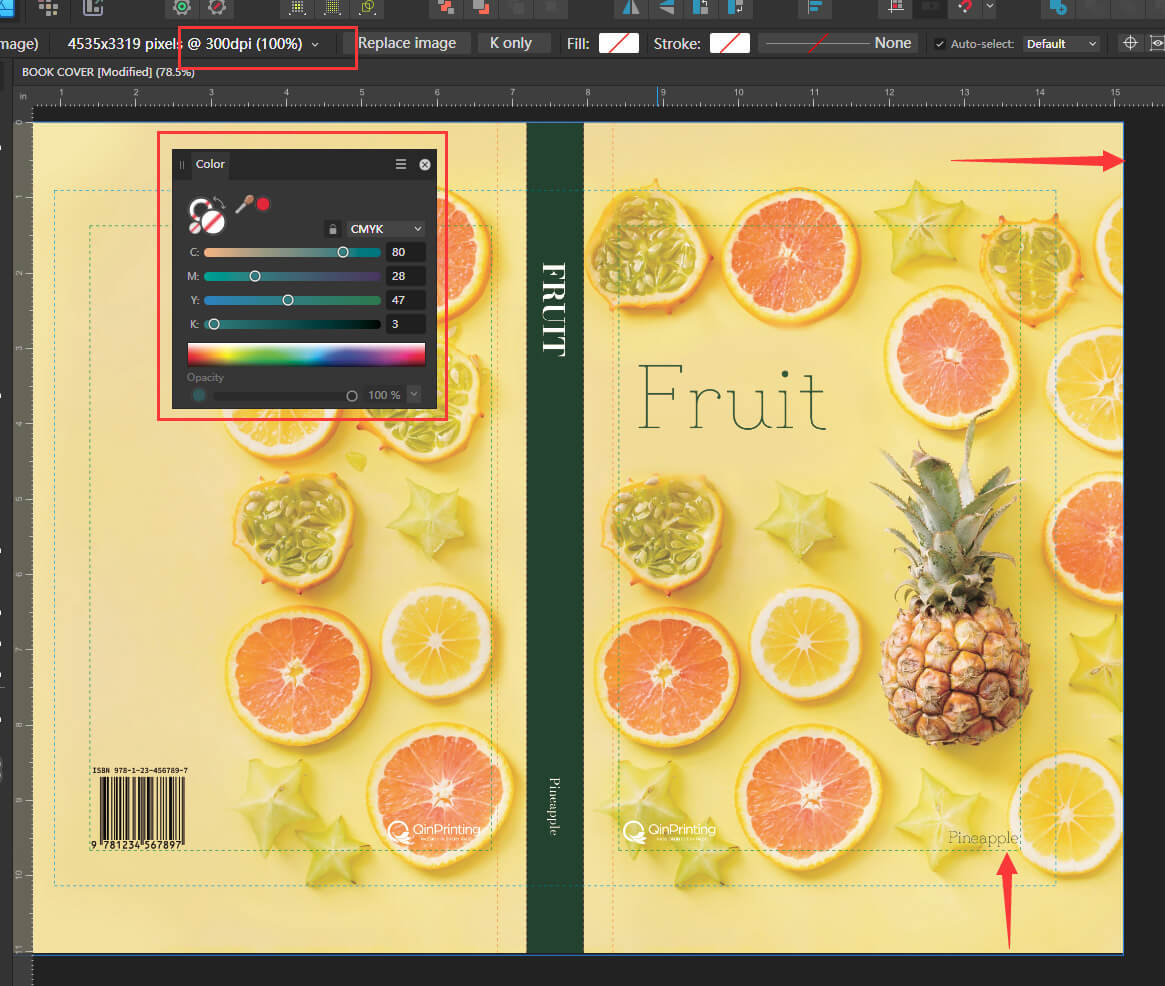
Now that your document is set up, you can begin designing your cover. When working with images, make sure they are all in CMYK mode and have a resolution of 300 dpi. Even with your basic document parameters already set, if you import an image from another file or location, you’ll need to check it’s compatible.This will make that your images will print crisply and without any distortions. Extend your background images or artwork to the red bleed line, so they go beyond the trim area, preventing any white edges after trimming.
Text and other important design elements should always be placed within the green safe zone. This area is well inside the trim lines—about 0.125″ or 3 mm—so you can be confident that nothing vital will be cut off when we trim the pages down to the correct size. Remember to maintain a balanced layout, considering both aesthetics and functionality. For example, in a children’s book cover, the title and illustration should work together to create an engaging visual combo that is both attractive to look at and easy to read. If you’ve never designed a book cover before, we heartily recommend choosing half a dozen of your favorite book covers and trying to replicate them; just as an exercise, it’s an effective and useful way to learn what makes a good cover in terms of imagery, text, color, and composition.
Step 6: Hide the template and export your file
Once your design is complete and you’re happy with it, the next step is to prepare the file for printing. Start by hiding the group containing the template (that you created in step 4) so that it doesn’t show up in the final PDF.
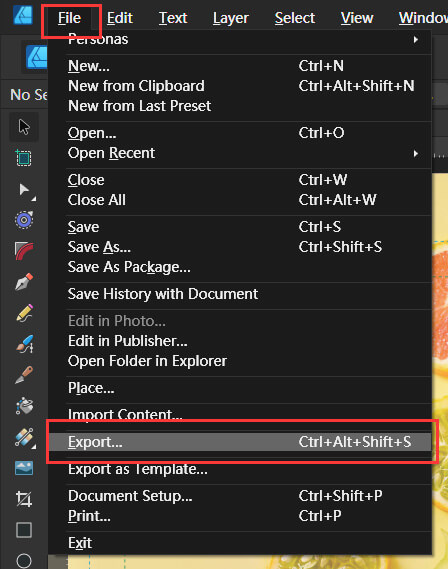
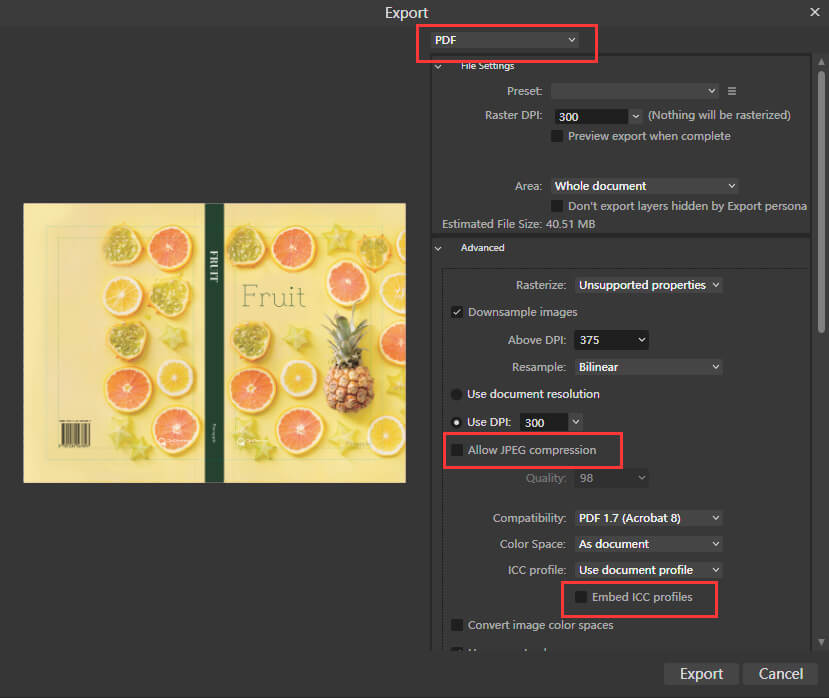
Then, go to ‘File’ > ‘Export’. In the export settings, choose ‘PDF’ as the format. For the preset, select ‘PDF (for print)’. Make sure that ‘Allow JPEG compression’ and ‘Embed ICC profiles’ are not checked. These settings help maintain the quality of your images and colors during printing.
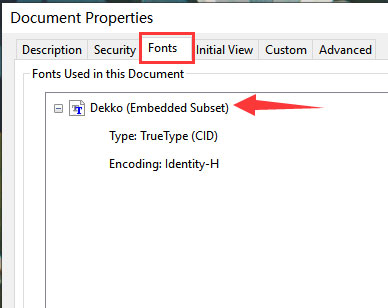
After you’ve exported your file, there’s just one last step to do before you send it to us and that’s check it! So, open the PDF (ideally in Adobe Acrobat) and check the file’s properties by going to ‘File’ > ‘Properties’. Under the ‘Font’ section, confirm that all fonts have the ‘Embedded Subset’ symbol. Look over it to check that everything’s where it should be, sized properly and that no typos or other textual errors have crept in during the design process.
Need more help or ready to take the next step? Let's talk!
We’ve tried to make creating a print-ready book cover using Affinity Designer and a template from QinPrinting into an easy streamlined process that enables you to balance creative freedom with technical precision. By following the steps outlined in this guide, you can produce a professional-quality cover that meets the exacting standards of print production without breaking into a sweat. Whatever your project, using one of our templates is a smart choice that saves you time and reduces the risk of costly errors.
A well-designed cover does more than just protect the pages inside—it makes a statement about the content and invites readers to explore what you’ve created, whether that’s a narrative, a visual feast, a literal cookbook feast, or a fun entertainment book for kids. We pride ourselves on the excellence of our support for all our customers.

